Hello!
Goodnight!
I recently made a tutorial teaching how to create a virtual machine using VMware Player. Now, I'm going to show you how to do the same thing, using another well-known freeware tool that rivals VMware, Oracle Virtualbox (Formerly Innotek VirtualBox).
Oracle VirtualBox
- Download the Oracle VirtualBox and install it on your operating system.
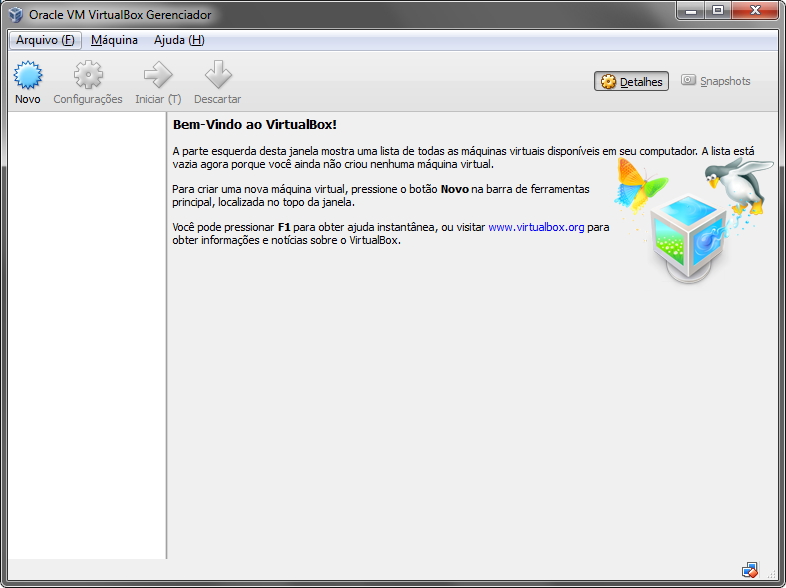
VirtualBox - Home Screen - Click on the “New” button
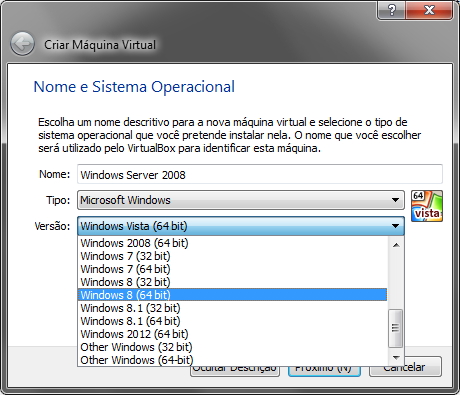
VirtualBox - Windows Version - Unlike VMware Player, here we manually choose the Windows version. Note that there is no Windows Server option in the list. I will use the “Other Windows (32-bit)” option.
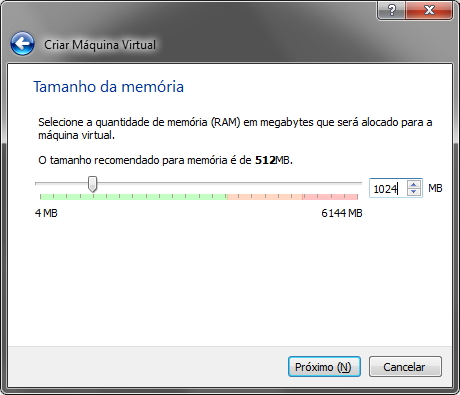
VirtualBox - Memory - Here we can define the amount of RAM we will use in the virtual machine. The software already has the recommended value according to the operating system. Remember that RAM is shared between the VM and your physical machine, so never put more than 50% of your total RAM in the VM
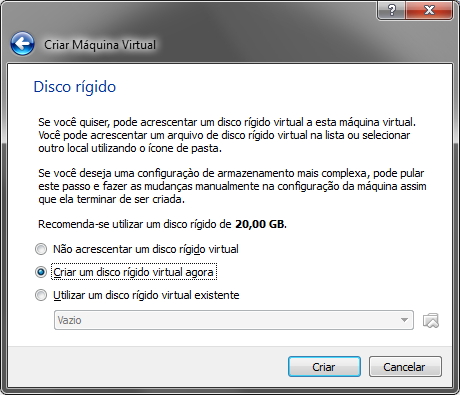
VirtualBox - HD 
VirtualBox - HD Type
- Here we will choose the hard disk type of the virtual machine. I recommend using the VDI type, which is the VirtualBox default. Another suggestion is to use VMDK, which is the default for VMware Player and can be used by it too.
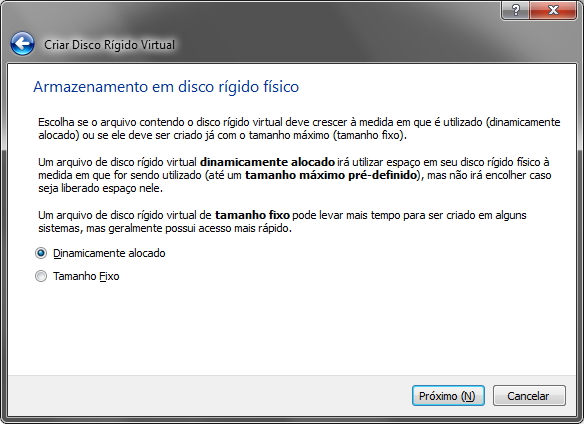
VirtualBox - HD Type - Here we will define whether the VM's virtual disk will be created with a pre-allocated fixed size (already consuming all the defined disk space) as soon as we create the VM, or whether it will be allocated dynamically, that is, as more space is needed, the virtual machine will automatically allocate it up to the pre-defined limit size on the next screen.
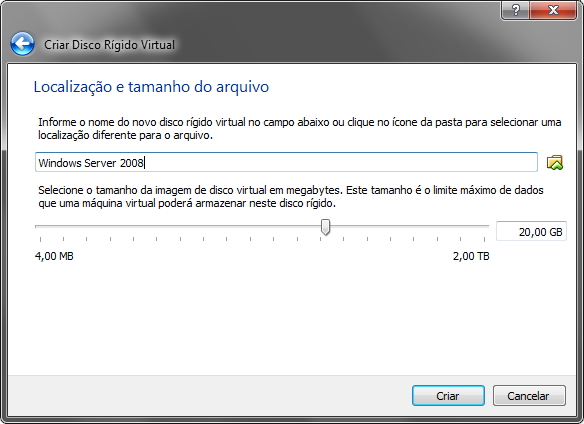
VirtualBox - Dynamic HD - On this screen, we will define the name of the virtual machine and the maximum disk size.

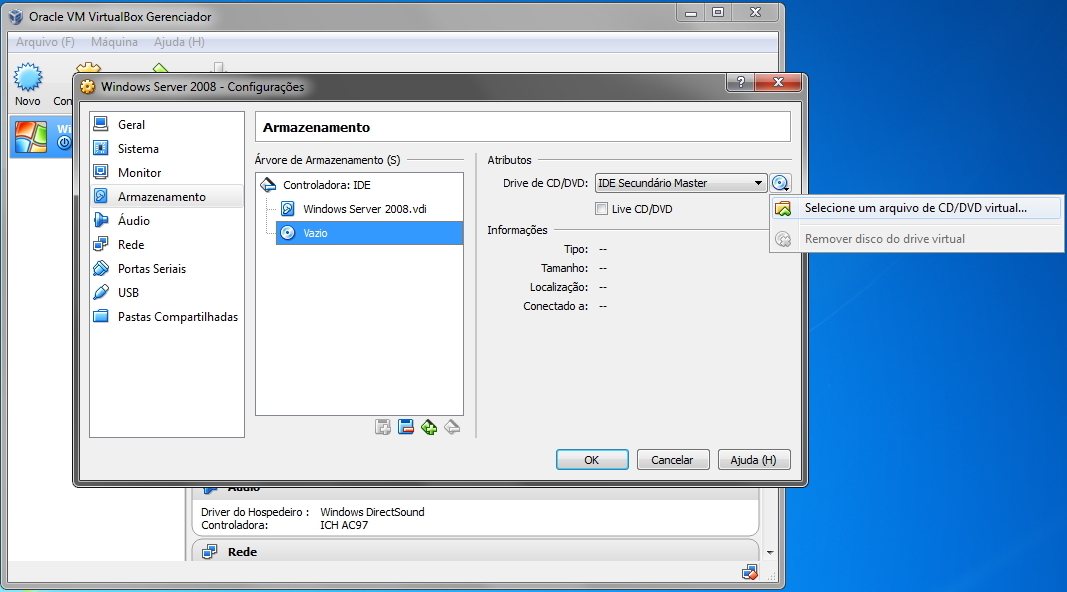
VirtualBox - Configured Home Screen - Let's now click on “Storage”, open the settings screen and select the operating system installation ISO.
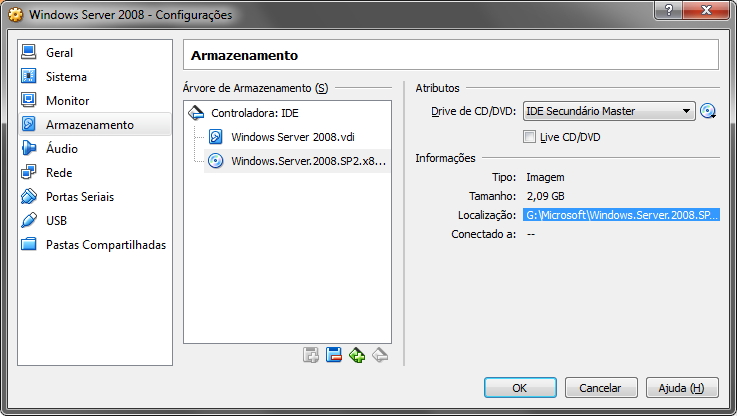
VirtualBox - ISO - After selecting the ISO file, the screen should appear like this.
VirtualBox - Selected ISO - On this screen, we can configure the amount of memory and cores of the virtual machine, shared folders, networks, etc.
-
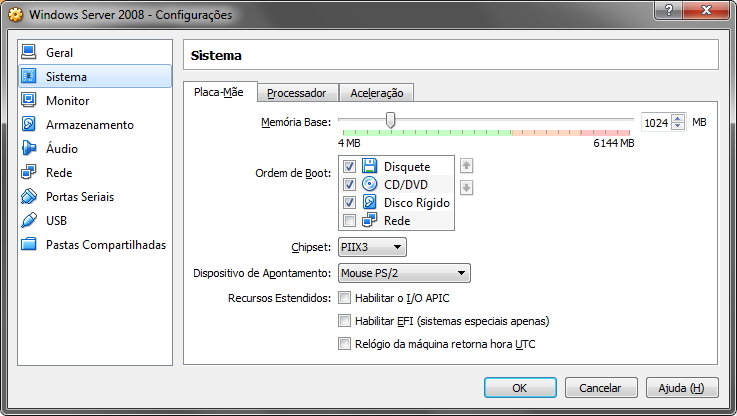
VirtualBox - RAM Memory Motherboard and Memory Configurations
-

VirtualBox - Processor Settings Processor Settings
- Click on the “Start” button
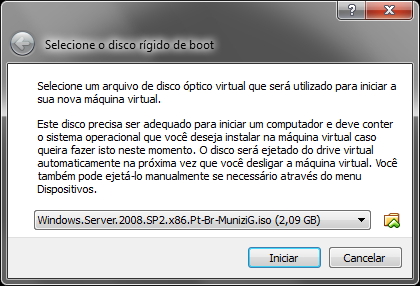
VirtualBox - Boot Disk - Select the boot disk for your virtual machine. As we are installing, it will be the CD/DVD drive that we will use for installing Windows Server 2008 R2.
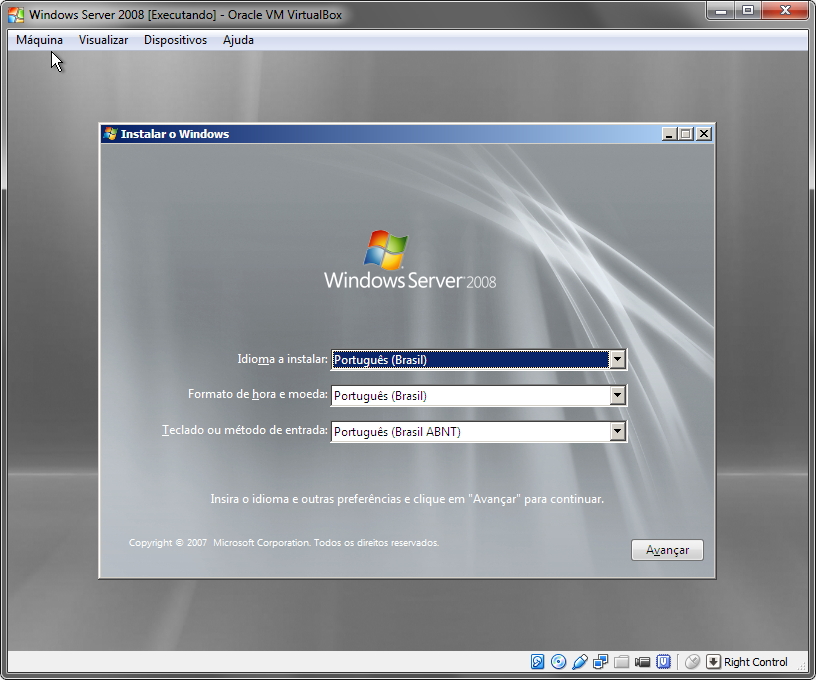
- When you click OK, another window will open in the background, where the virtual machine will run. You can close or minimize the VirtualBox splash screen and change the focus to the virtual machine's run window.
- When you click on the window where the virtual machine is running, several alerts will appear teaching you how to use VirtualBox. Note that when you click on the window, your mouse will be “stuck” inside it. To exit, press Ctrl on the right screen (next to the left arrow). This key can be changed on the settings screen.
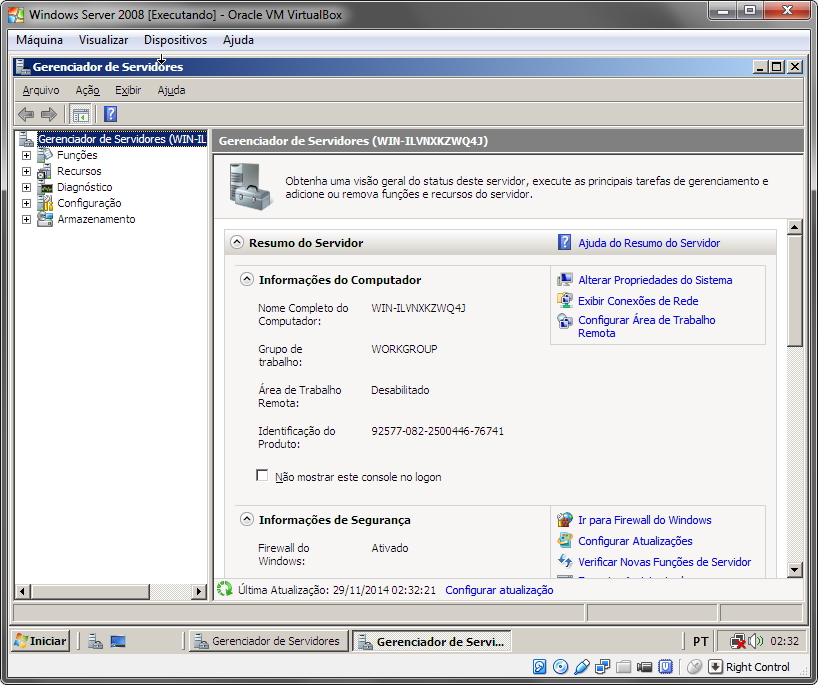
VirtualBox - Windows Installation - After installing Windows, our virtual machine is configured and installed.
VirtualBox - Installed
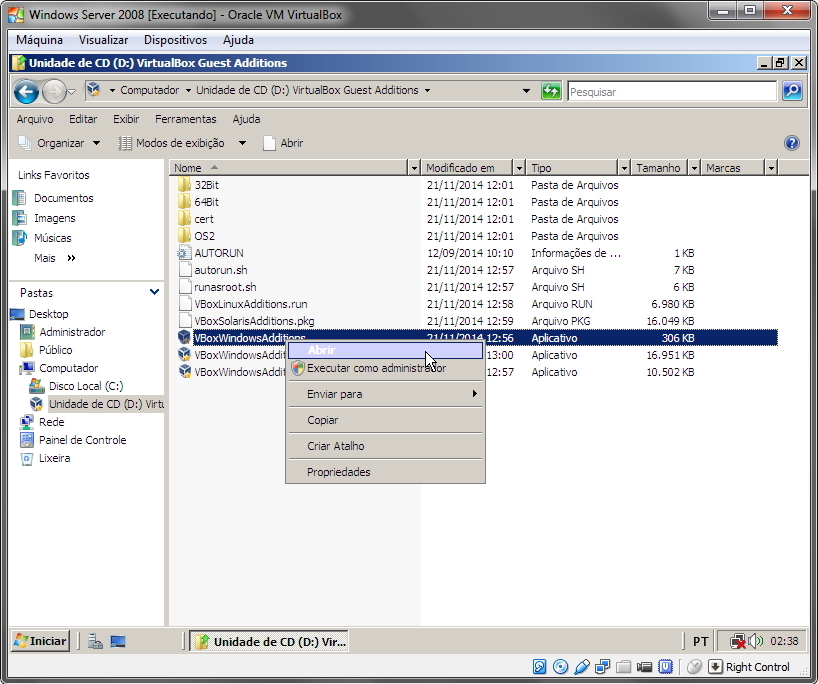
Image for guests

- Similar to VMware Tools, this tool adds the ability to automatically adjust the virtual machine's resolution according to the window size and improves mouse integration between the physical machine, no longer locking the mouse when clicking inside the VirtualBox window.
- Installation is manual. You need to open Windows Explorer (or My Computer), go to “CD Drive” and then run the program. Installation is very simple, standard “Next, Next, Finish”, with only a few driver installation alerts appearing.
VirtualBox - Guest Image Installation - Restart the virtual machine for the installation to take effect.
Shared Clipboard and Drag N’Drop
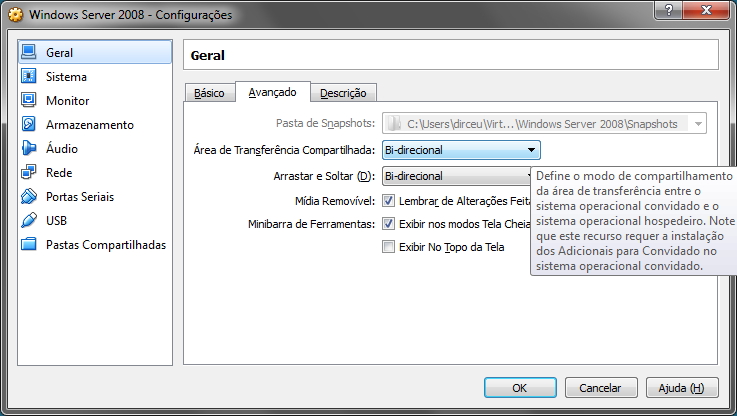
- These settings allow you to enable the shared clipboard, which allows both the virtual machine and the physical machine to “see” the same information, making it possible to copy a text or file to the virtual machine (Ctrl+C) and paste it to the physical machine (Ctrl+V) and vice versa.
- It is also possible to enable the drag and drop feature to transfer files between machines in an easier and more intuitive way.
- Possible modes:
– Disabled
– Host to Guest (The physical machine can view the virtual machine’s clipboard, but not the other way around)
– Guest to Host (The virtual machine can view the physical clipboard, but not the other way around)
– Bi-directional (works between the two machines)
Shared Folders
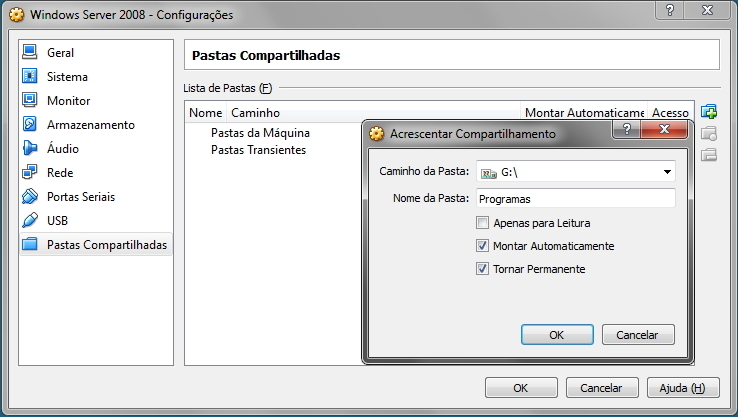
- Another very interesting and useful feature of VirtualBox is the possibility of creating shared folders on your virtual machine with your Desktop, whether sharing a folder or an entire partition.
Screenshots
- An interesting feature that VirtualBox has that VMware does not is the screen capture feature, which allows you to take a screenshot of the screen or record a video of what is done in the virtual machine, all native.
Power Options
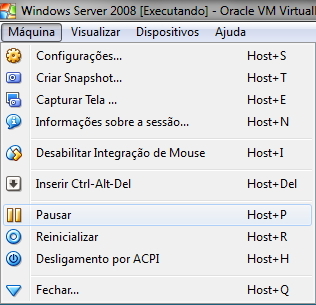
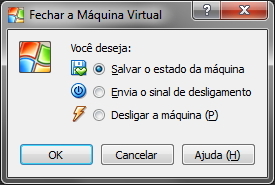
- Switching off the machine (P): It is used to turn off the virtual machine abruptly, simulating a shutdown using the Power button on your case. I do not recommend using this option, as it can corrupt your VM, as well as damaging your physical machine when doing so. Always shut down your VM from the operating system itself.
- Send shutdown signal: It is used to shut down the virtual machine using a shutdown command that is sent to the operating system, so that it takes care of shutting down the computer correctly, without running the risk of damaging any files.
- Pause or Save Machine State: Allows VirtualBox to save the exact status of your virtual machine (including open programs, everything), save that block of RAM memory on your HD and shut down your VM. When you turn it back on, it will start exactly where you were.
- Reset: Forcefully restarts your virtual machine, as occurs when Shutting down the machine (P), simulating pressing the Reset button on the case. I also don't recommend it unless the virtual machine has crashed and Ctrl+Alt+Delete doesn't solve it.
And that's it folks,
Until next time!

Comentários (0)
Carregando comentários…