Goodnight!
All good ?
Today I'm going to write this post teaching you how to create a virtual machine (VM) using one of the most well-known freeware tools for this: VMware Player.
If you want to know how to create a virtual machine with Oracle VirtualBox, feel free to contact me. clicking here and find out.
VMware Player
- Download the VMware Player and install it on your operating system.
-

VMware 1 VMware Player Home Screen
- Let's click Create a New Virtual Machine
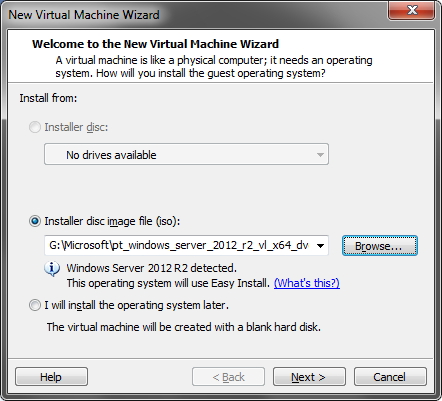
- On this screen, we can create our VM in 3 different ways:
– Installer disc: It will create the VM and install the operating system from the PC's physical media drive.
– Installer disk image file (iso): It will create the VM and install the operating system contained in an ISO image file on your computer, which you will select by clicking the “Browse…” button. This is the most common option and the one I will use in this tutorial. Note that when selecting the ISO, VMware will recognize the operating system contained in the ISO in most cases.
– I will install the operating system later: It will create the VM without an operating system, which will have to be installed manually later. -
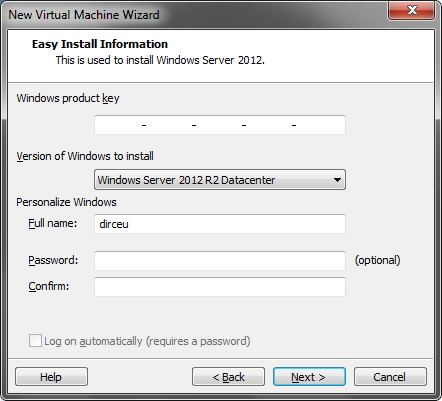
VMware 4 - In the case of the Windows operating system, the screen appears to define our Product Key (activation key), the version of Windows that we will install and configure the Windows username and password. This is requested so that VMWare can install the operating system automatically, without the need for human intervention.
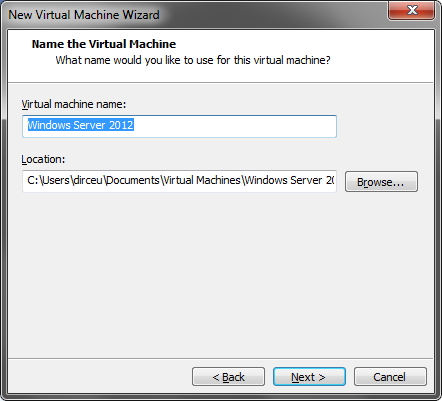
VMware - Saving the VM - Now we will define the name of our Virtual machine and where it will be saved on the HD.

VMware - HD Information - We define the maximum size of the virtual machine's HD. If it is necessary to increase in the future, we can do this through the VM configuration screen, and then we will have to run a partitioning tool within the VM's operating system, such as Paragon Partition Manager. Here we also define whether the physical VM files on your computer (vmdk extension) will be written in a single file, or divided into several files. Creating a single file (the option I use) makes using the VM faster and reduces the risk of corrupting your virtual machine, but if you need to copy to another location, this will take more time.
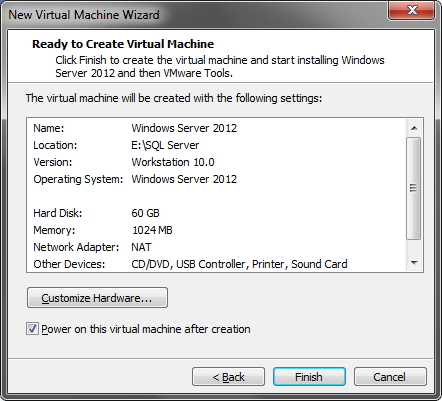
VMware - Confirmation Screen - Here we can confirm the installation and selected settings for our VM. If you want to change the hardware of your VM, just click the “Customize Hardware…” button, which I will demonstrate now (this is optional. If you don’t want to change anything, just click the “Finish” button).
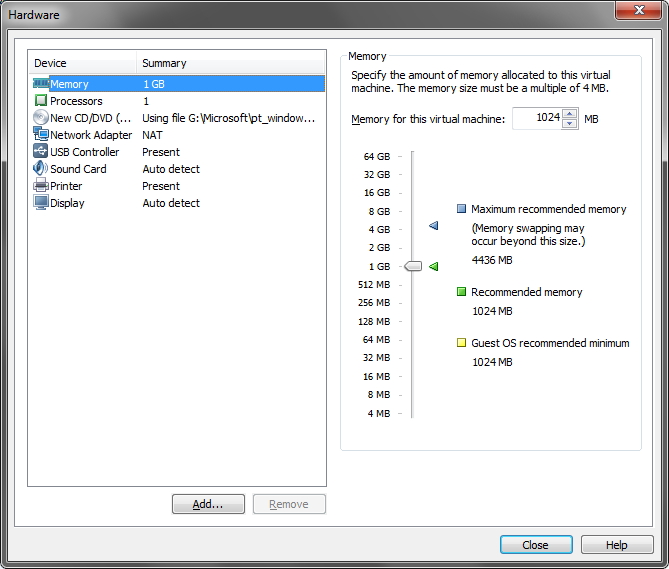
VMware - Hardware - On this screen, we can change the available amount of RAM in your VM. The software already has the recommended values, recommended maximum and minimum required by the operating system. Remember that RAM is shared between the VM and your physical machine, so I never put more than 50% of your total RAM in the VM. From this screen, you can also increase the number of cores in your VM, change the installation ISO, configure the network connection method, etc. Honestly, I don't recommend changing these other settings unless you have a problem with them.
- Make the necessary changes and click “Close” to return to the previous screen
- Click “Finish” to complete the installation.

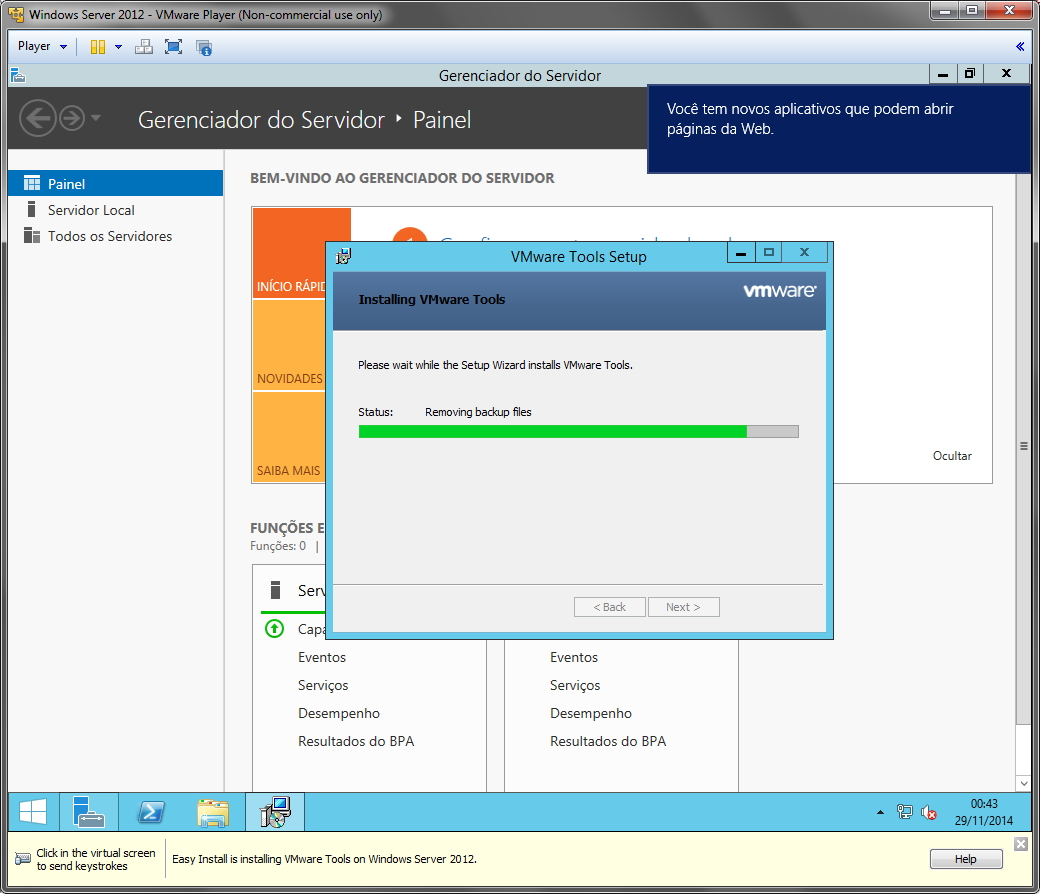
VMware - Tools - Our VM is almost ready. As you can see, I'm already using Windows Server 2012, and now all that's left to do is configure VMware Tools, which is a set of VMware tools to make using your virtual machine easier. Among the features it provides us, I highlight the ability to auto-expand the screen whenever you resize the window and clipboard synchronization, that is, you press Ctrl+C on your VM to copy a text or file and press Ctrl+V on your physical machine to paste what you copied and vice versa. You can also transfer files between the virtual and physical machine by dragging and dropping the files.
- Generally, VMware Tools is installed automatically, but if not, simply click on the “Manage” menu and then on the “Install VMware Tools” sub-menu.
Power Options
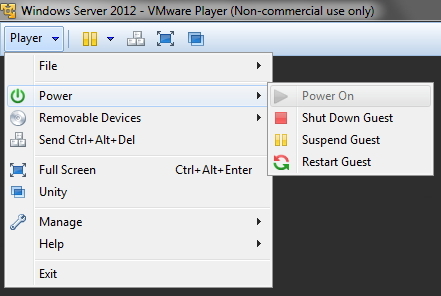
- Power On: It is used to turn on your virtual machine when it is turned off. In the print it is disabled, as the VM is already connected.
- Shut Down Guest: It is used to turn off the virtual machine abruptly, simulating a shutdown using the Power button on your case. I do not recommend using this option, as it can corrupt your VM, as well as damaging your physical machine when doing so. Always shut down your VM from the operating system itself.
- Suspend Guest: It allows VMware to save the exact status of your virtual machine (including open programs, everything), save that block of RAM memory on your HD and shut down your VM. When you turn it back on, it will start exactly where you were.
- Restart Guest: Forcefully restarts your virtual machine, similar to Shut Down Guest, simulating pressing the case's Reset button. I also don't recommend it unless the virtual machine has crashed and Ctrl+Alt+Delete doesn't solve it.
Removable Devices
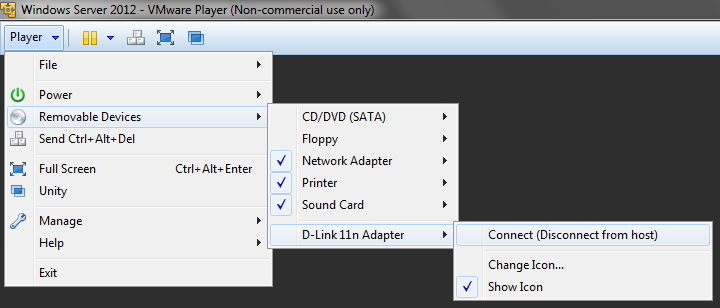
- This menu allows you to choose which device will be connected to the virtual machine or the physical machine. A pendrive, for example, you can define that it will be available in the VM instead of the physical machine, for example, and you can work with the files on the pendrive from within the virtual machine.
Unity

- Perhaps this is one of the best features of VMware Player!!! It allows you to use the programs on your Virtual machine ALONG with those on your physical machine, even appearing on your taskbar. This allows you to run Linux and MAC software within your Windows operating system as if they were native and vice versa.
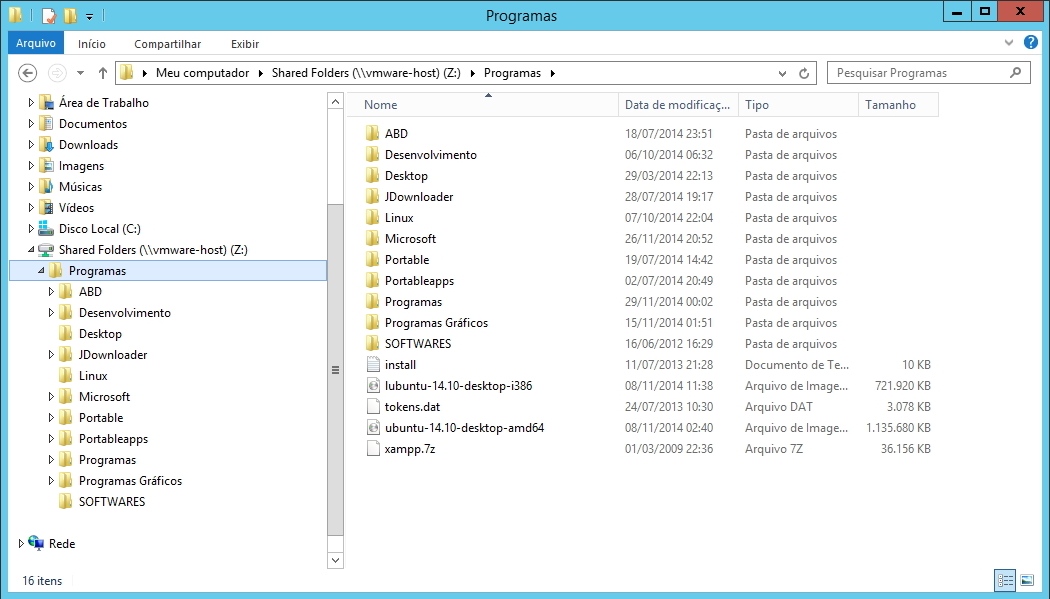
Shared Folders
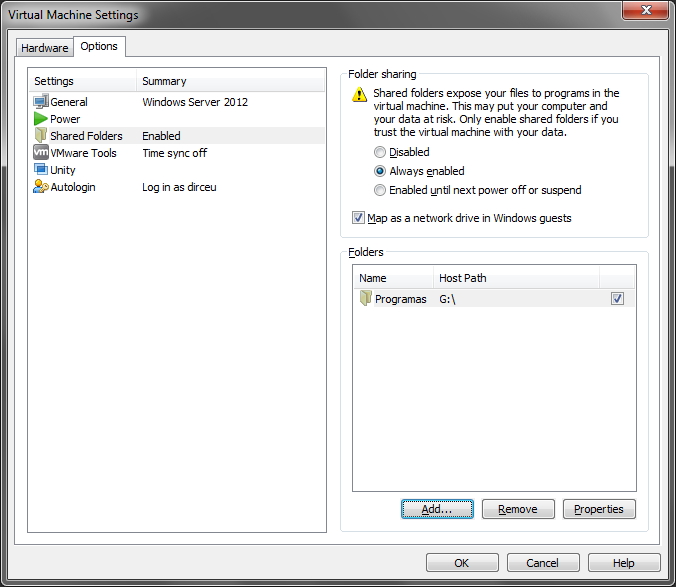
- Another very interesting and useful feature of VMware is the possibility of creating shared folders in your virtual machine with your Desktop, whether sharing a folder or an entire partition. After selecting the folders and activating sharing, accessing files on the physical machine through the VM is as simple as this:
And with that, we end this tutorial!
I hope it was useful and see you next time!

Comentários (0)
Carregando comentários…