
Hey guys!
In this post I would like to share with you how to create and manage users and logins. I will explain what the Azure Active Directory admin user/group is, what the admin server is, how to create it and what are the differences between a login created in the instance and a user created in the database.
It is worth remembering that the Management Studio interface does not yet support creating logins and users, so this must be done via T-SQL commands.
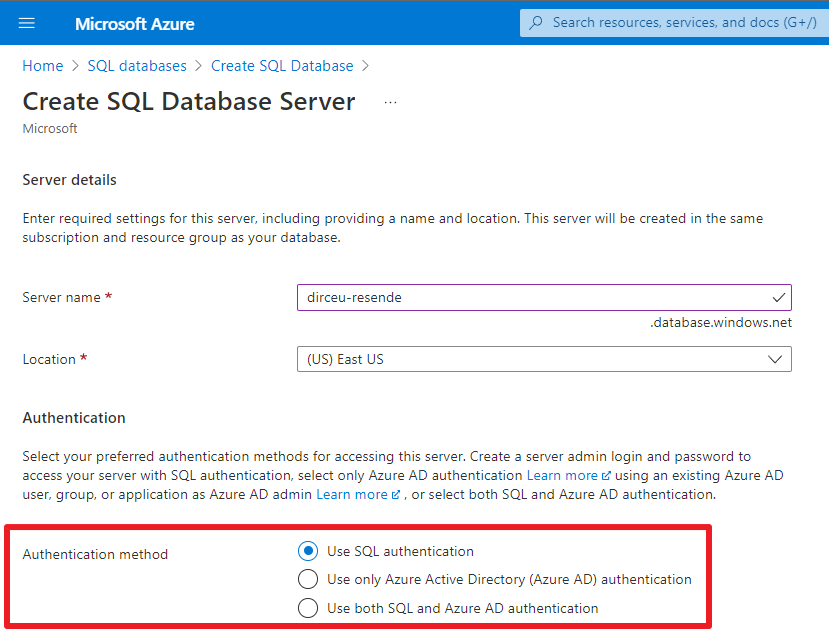
Authentication Methods
Click here to view the contentThis will define whether your server will accept connections using Azure Active Directory (Azure AD) only, whether it will only accept connections using SQL authentication or whether it will accept both forms of authentication.
The safest way, and Microsoft's official recommendation, is to use the option to accept only Azure Active Directory (Azure AD) authentication, since the responsibility for managing passwords and credentials lies with Azure Active Directory and not the database. Additionally, you can set 2-factor authentication, for example, requiring the user to confirm login on an external device such as their cell phone or email.
Users with SQL authentication are also susceptible to brute force attacks, as the database will not monitor and block excessive connection failure attempts by default, while Azure AD has this blocking by default, reports on connection failures, Artificial Intelligence analyzing all logins and blocking suspicious logins, etc.
Another positive point for this choice is that if this person leaves the company, simply deactivate their login to Azure Active Directory and they automatically lose access to all banks. Using SQL authentication, you will have to go bank by bank, check if this user had access, and delete/deactivate this account.
However, we know that it is not always possible to block authentication using SQL credentials, especially when we talk about legacy systems, some BI tools or some types of integrations. In these cases, SQL authentication ends up being necessary. If this is not your case, I suggest just maintaining authentication using Azure AD.
Depending on the chosen authentication method, the Azure Active Directory admin and Server admin options are shown/hidden.
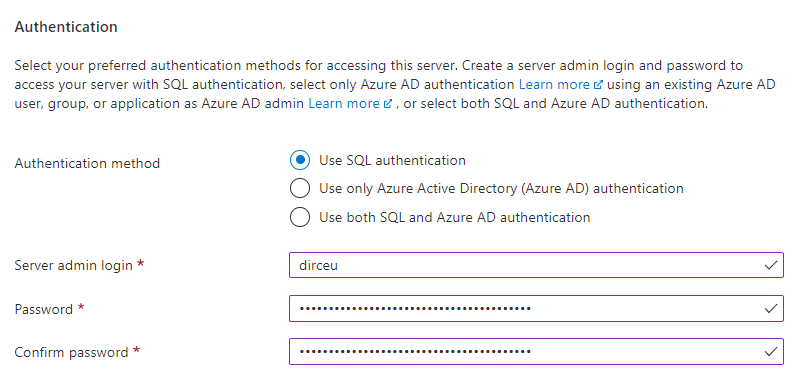
Use SQL authentication
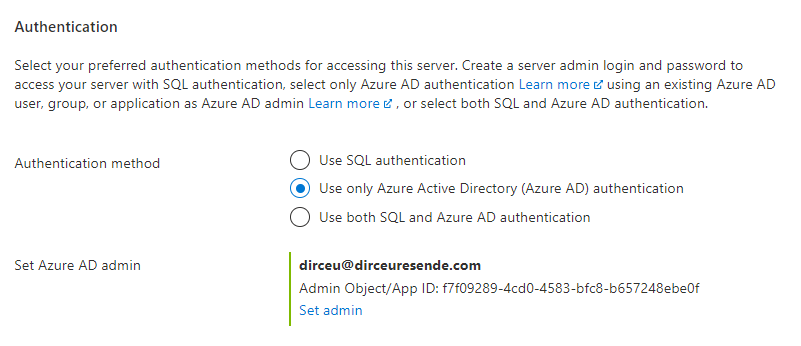
Use only Azure Active Directory (Azure AD) authentication
Use both SQL and Azure AD authentication
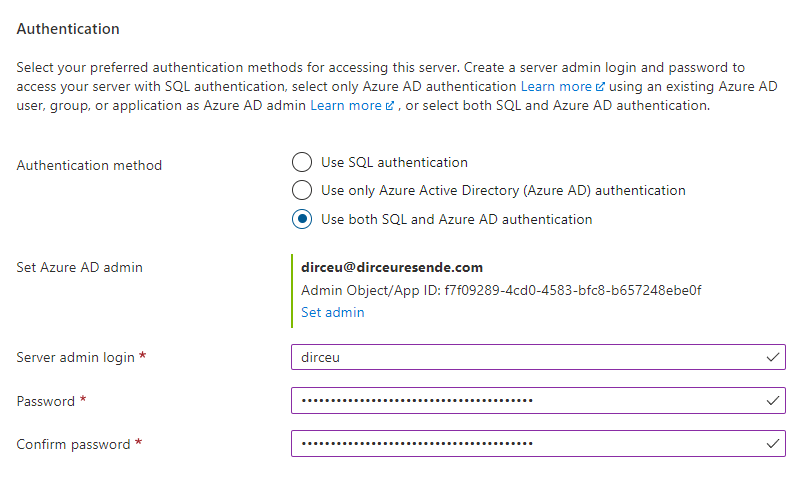
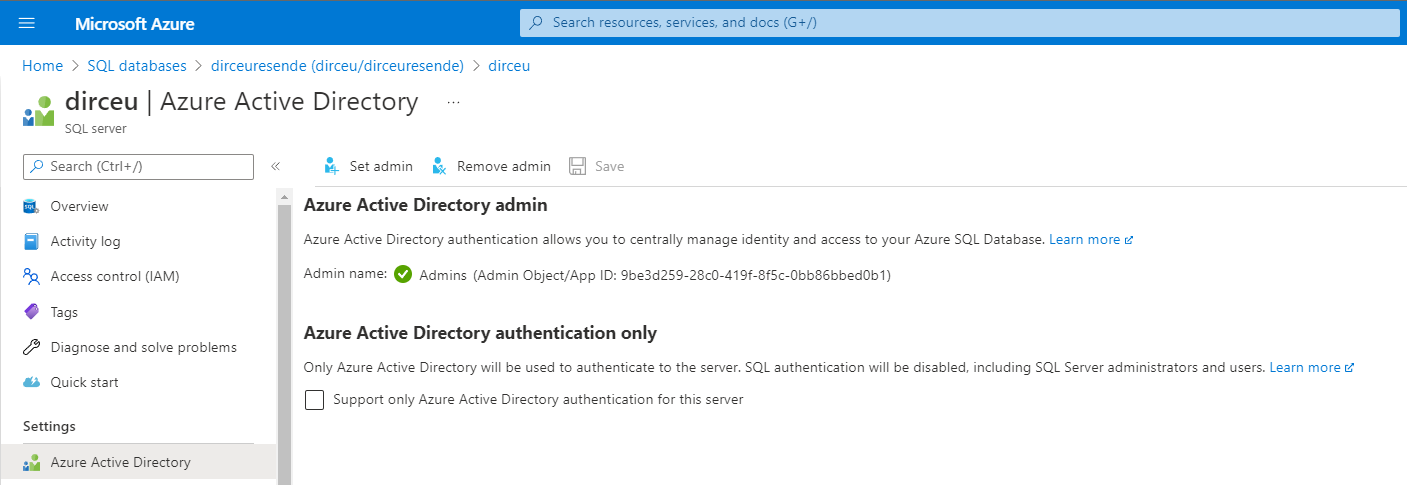
Azure Active Directory admin
Click here to view the content
This user or group will have unrestricted access to the server's databases, with permission to manage users/logins, all databases and unrestricted access to data as well, and can be used to connect to the database.
The user assigned as Azure Active Directory admin cannot change any server properties through the Azure Portal (if she does not have other permissions on the resource and/or Subscription/Resource Group) nor can she change the admin user. With this assignment alone, he will not be able to open or view the resource through the Portal.
Its permissions are only at the instance level, connected to the database. From the moment this user connects, he will have access to do everything that is possible using T-SQL.
Some configurations such as Firewall, Service Tier and creation of other databases, this user can do using T-SQL commands, but cannot do it through the Azure portal.
It is worth remembering that only ONE user can be assigned to be an Azure Active Directory admin. If you want to have more than one person with this level of access, create a group, add the users to that group, and assign that group as the Azure Active Directory admin.
Alert: The user/group that is Azure Active Directory admin automatically has access to the database.
After the server has been created, you can still enable/disable authentication via Azure Active Directory (Azure AD) and also manage the admin user.
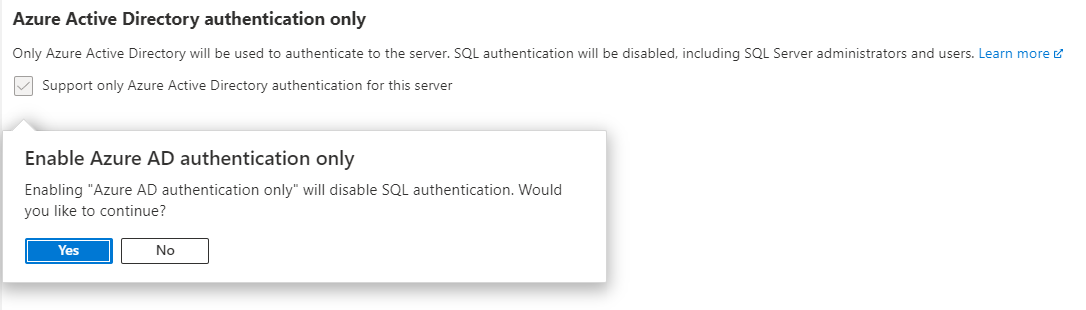
If you try to activate the “Azure Active Directory authentication only” option, to only allow authentication using Azure AD, you will see a confirmation asking if you really want to activate this option, because it will DISABLE SQL authentication and all users using this type of authentication, including the “sa” user (Server admin)
Server admin (sa)
Click here to view the contentThis means that this user does not have any access to the Azure portal and cannot change anything there or change any properties. However, it can be used to log into the instance and it will have access to all data, from all tables, in addition to being able to change/create/delete any user, login, permission or object in the database, in addition to managing the database and server firewall via T-SQL commands.
As I already mentioned in this post, this alternative is the least secure possible, since the database is responsible for managing passwords and users. It does not support MFA and each user can have a different password, at different banks.
If you want to deactivate the same user in several banks, you will have to go bank by bank to deactivate/delete the account (or create a script to automate this), instead of simply deactivating the account in AD.
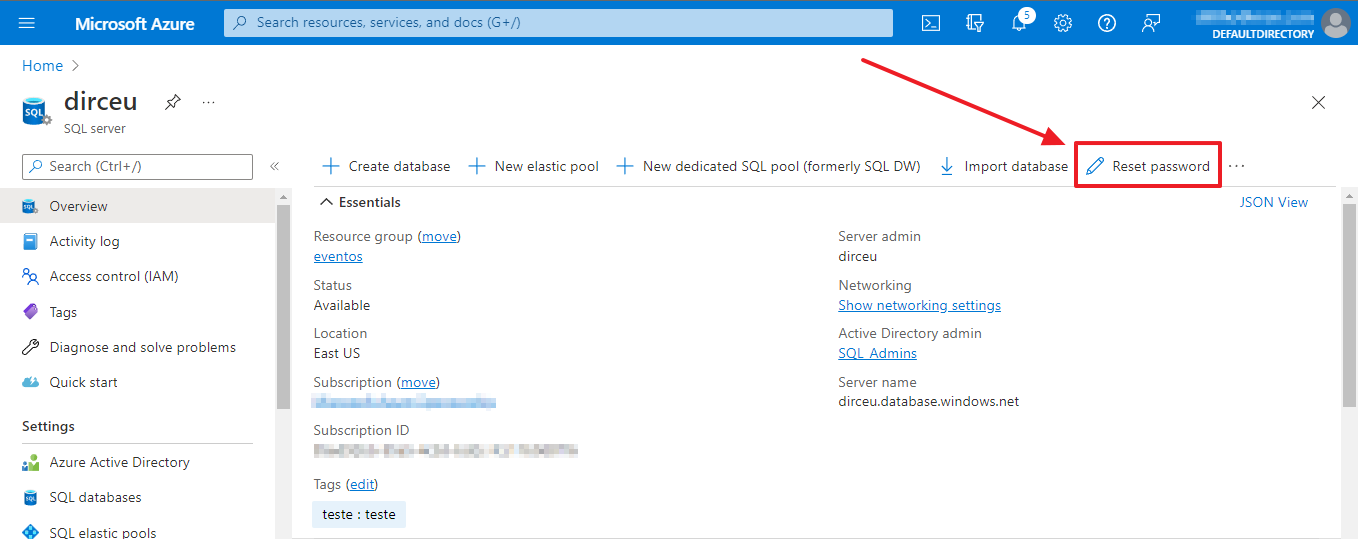
It is not possible to change the Server admin name once the server is created, but it is possible to reset the password if necessary
This user is only available if you select the “Use SQL authentication” or “Use both SQL and Azure AD authentication” authentication method.
If you chose these options and then changed the authentication method and then changed it to only allow authentication with Azure Active Directory, this user will be deactivated, as will all others using SQL authentication.
Login Creation
Click here to view the contentLogin is a way to connect to the bank, where the initial bank will be the “master” and then it can change the context to the desired bank. Additionally, the login can be added to any server role to receive server-level permissions.
Creating a login with SQL authentication
Simple. Fast. Practical. Insecure. And one more user will have to keep their password updated, changing it from time to time (and changing it in apps), worrying about brute force attack attempts, password leaks, etc.
To create a login with SQL authentication, simply follow the script below:
USE [master]
GO

CREATE LOGIN [dirceuresende]
WITH PASSWORD = 'zlg*I1MoPZ^Xk8TNCNs%'
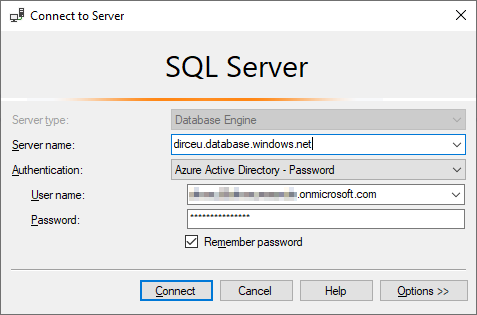
Creating a login with Azure Active Directory authentication
The first step to this is to access Azure Active Directory to obtain the “Principal User Name” (UPN) of the login I want to add to the database:
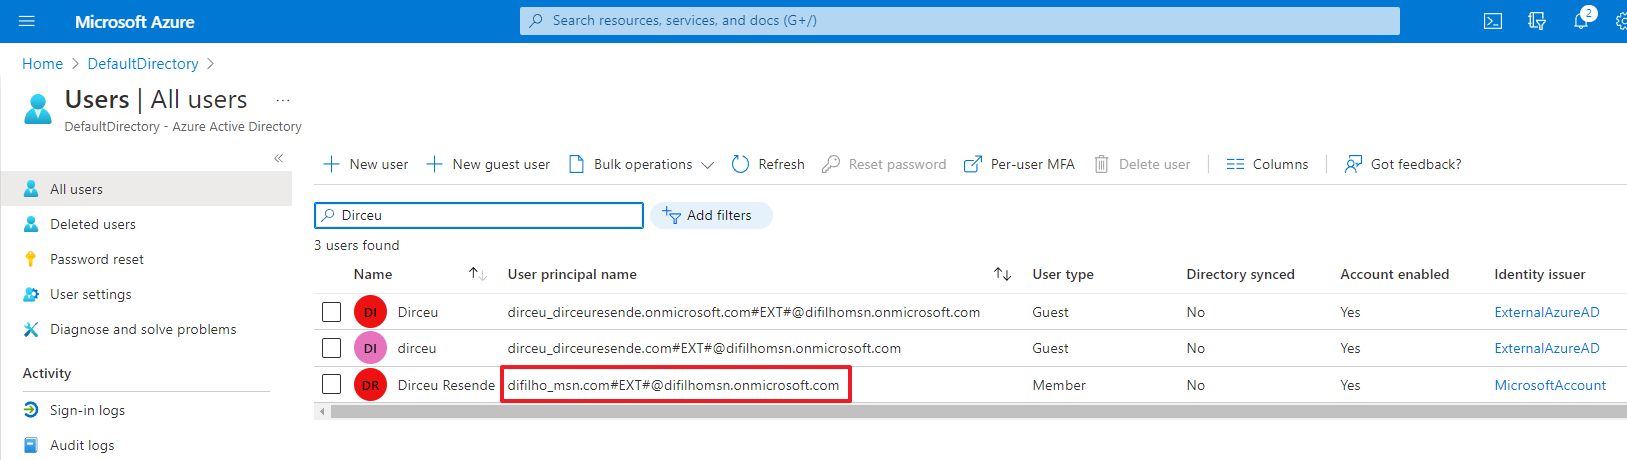
Now that I know the User Principal Name, I can create a login to the “master” bank
USE [master]
GO

CREATE LOGIN [difilho_msn.com#EXT#@difilhomsn.onmicrosoft.com]
FROM EXTERNAL PROVIDER
Notice that I didn't need to set any password for login. The password will be the Azure Active Directory password itself, a single centralized location for managing users and passwords.
Tip: If you are going to use SQL authentication, I suggest using password generator websites, such as LastPass and choose a very complex password (I usually use 50+ characters)
User Creation
Click here to view the contentI list below the differences between Login and User:
| Login | User |
|---|---|
| Created in the "master" bank | Created in the bank where it will connect |
| The connection is made without having to specify the database | The connection is made by specifying the database |
| Login can receive server-level permissions (through server roles) | User cannot be granted server-level permissions |
| Login cannot be granted permissions on a database | User can be granted permissions on a database |
| Login can NOT access any database | User can access the databases they have access to, even if they are not associated with a login |
| Login must be associated with a user to access a database | User does NOT need to be associated with a login (It's even better if it isn't) |
If you choose to create a login and then create a user associated with a login, authentication will be done via login, without having to specify the database name. When connecting to the server, this person will view all databases, making a possible attack easier.
Creating a user using SQL authentication
As I mentioned previously, this option is the least secure, but it is the simplest, most practical and easiest to use, especially if you are using legacy systems or applications that do not support connecting using Azure Active Directory.
-- Crio o usuário no banco desejado
CREATE USER [dirceuresende]
WITH PASSWORD = 'sd9s8d98asd989*(334'
GO

-- Adiciono o usuário na role "db_datareader",
-- para ter acesso de leitura em todas as tabelas
ALTER ROLE [db_datareader] ADD MEMBER [dirceuresende]
GO

-- Libero a permissão de "EXECUTE"
-- em todos os objetos do banco
GRANT EXECUTE TO [dirceuresende]
GO
Creating a user associated with a login
In this scenario, there is already a previously created login, either using SQL authentication or Azure Active Directory and I will now create a user in the desired database, using this existing login. In this case, I will not specify a password when creating the user, as it will take advantage of the login authentication method.
/*
Crio o usuário "dirceuresende" usando o login "dirceuresende"
no banco desejado
*/

CREATE USER [dirceuresende]
FOR LOGIN [dirceuresende] -- Sem senha (vai usar a autenticação do login)


/*
Adiciono o usuário na role "db_datareader",
para ter acesso de leitura em todas as tabelas
*/

ALTER ROLE [db_datareader] ADD MEMBER [dirceuresende]
GO


/*
Libero a permissão de "EXECUTE"
em todos os objetos do banco
*/
GRANT EXECUTE TO [dirceuresende]
GO
Creating a user using Azure Active Directory (Azure AD)
As with creating a login, the first step in creating a user using Azure Active Directory (Azure AD) is to access Azure Active Directory to obtain the “Principal User Name” (UPN) of the user I want to add to the database:
Now that I know the User Principal Name, I can create the user in the desired bank
-- Crio o usuário vindo do Azure Active Directory no banco desejado
CREATE USER [difilho_msn.com#EXT#@difilhomsn.onmicrosoft.com]
FOR EXTERNAL PROVIDER -- Aqui pode usar FROM/FOR EXTERNAL PROVIDER


/*
Adiciono o usuário na role "db_datareader",
para ter acesso de leitura em todas as tabelas
*/

ALTER ROLE [db_datareader] ADD MEMBER [difilho_msn.com#EXT#@difilhomsn.onmicrosoft.com]
GO


/*
Libero a permissão de "EXECUTE"
em todos os objetos do banco
*/
GRANT EXECUTE TO [difilho_msn.com#EXT#@difilhomsn.onmicrosoft.com]
GO
Creating a user for an Azure Data Factory (Managed Identity)
Whenever possible, choose to use “Managed Identity” authentication in your Azure application or resource. This means that you only need to create the user in the database, without having to enter any username, password or KeyVault to access the database. To create the login/user in the bank, it is the same way as any other login/user with Azure AD authentication, with the difference that you will enter the name of the resource instead of the User Principal Name.
Practical example
I have an Azure Data Factory resource and I want to add it to the database so it has access to read and modify data and structures.
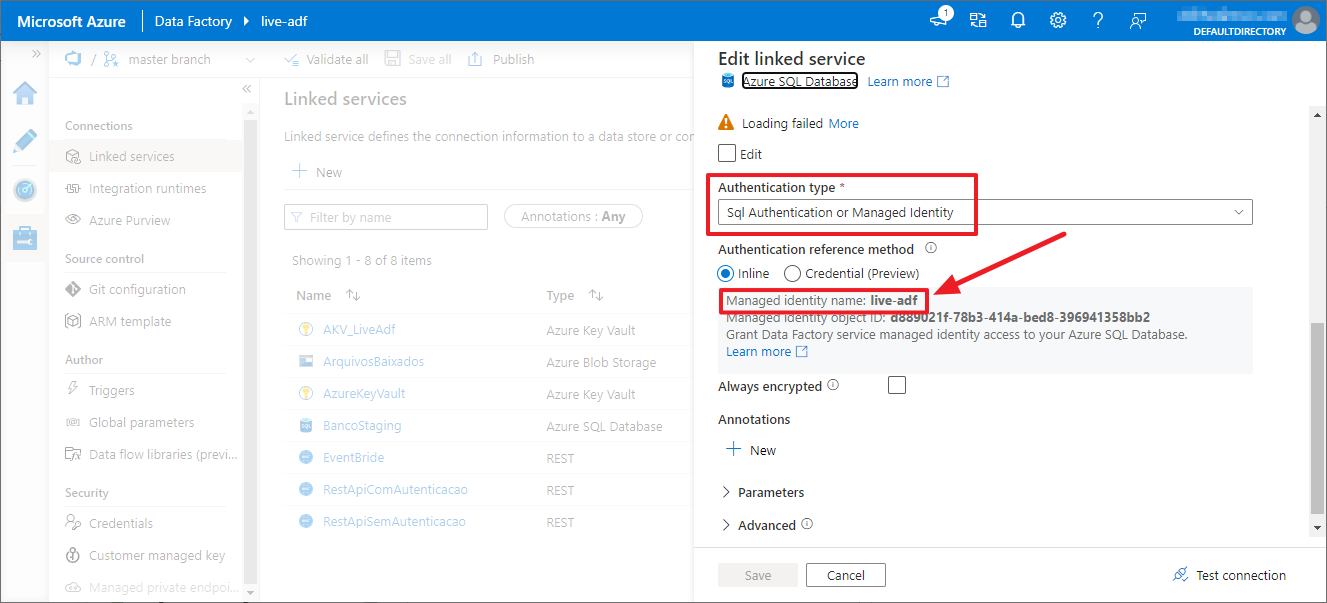
I will add the name of the resource now as a user (it's up to you between login or user) in the database
-- Crio o usuário com o nome do recurso do Azure Data Factory
CREATE USER [live-adf] -- Mesmo nome do recurso, conforme destaquei no print anterior
FOR EXTERNAL PROVIDER


-- Adiciono as permissões necessárias
ALTER ROLE [db_datareader] ADD MEMBER [live-adf]
ALTER ROLE [db_datawriter] ADD MEMBER [live-adf]
ALTER ROLE [db_ddladmin] ADD MEMBER [live-adf]
GRANT EXECUTE TO [live-adf]
GO
Result:

Creating a user for an App Registration/Service Principal
To create a user for an App Registration / Service Principal using Managed Identity, the process is the same, just enter the name of the AppRegistration and add it normally to the database.
Example:

Script to add this Service Principal to the database
CREATE USER [AppRegistration_DirceuResende]
FOR EXTERNAL PROVIDER
Another Tip: Need help implementing Managed Identity in your application? Take a read of the article Passwordless connection string to Azure SQL database using Azure managed identity
That's it, folks!
I hope you enjoyed this article and see you next time!

Comentários (0)
Carregando comentários…