Hey guys!
Good afternoon!
I was using my VM to create my previous post (How to query information from a CEP in SQL Server) and I had some problems accessing the internet.
The Problem
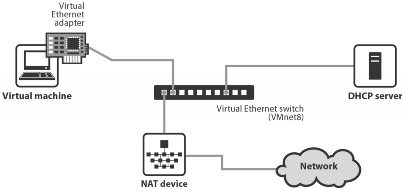
I have always used my VMs with the NAT (Network Address Translation) connection mode, which is the simplest and easiest to configure, works well and I have never had any difficulty with it. NAT mode allows your virtual machine to connect to the internal network using the IP of your physical machine. This is why you cannot have more than one VM connected to the internet using the NAT connection.
As I already had another VM running before opening this one, I was no longer able to use the network and I didn't want to have to close the other VM.
The Solution
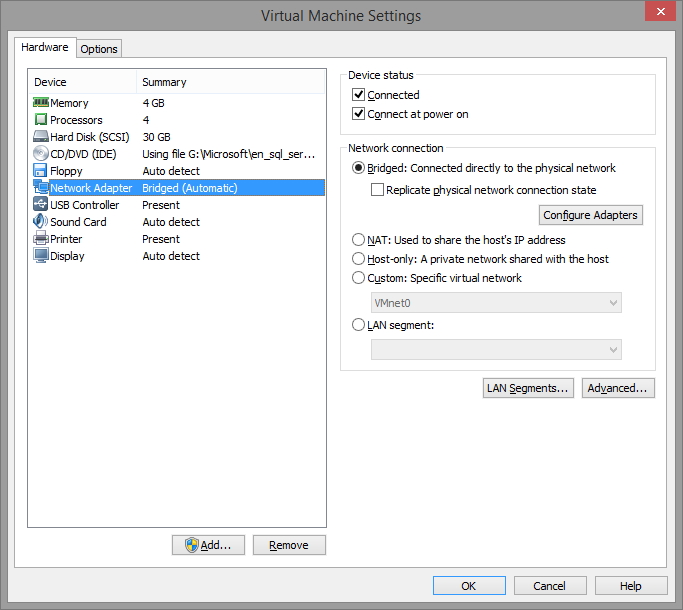
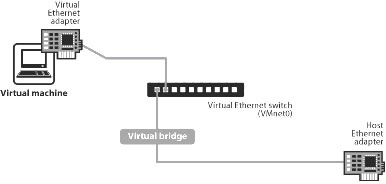
The solution to this problem is simple: Use the Bridge VMware Player, which allows your VM to connect directly to the internet, using your physical network card and assigning a unique local network address to the VM. If your internal network has the DHCP service, it will be responsible for providing a valid IP address for your VM.
With this, your VM becomes available to your network as if it were a physical machine and you also have the advantage of being able to access services that are in that VM such as a database, for example, through the physical machine or other machines on the network.
Complications for our solution
After identifying the problem and defining the solution, we will implement it. A task that seems simple, but has proven otherwise.
On my physical machine, I have several network adapters:
– TAP-9 Local Connection (VPN)
– Wi-Fi (Where I am connected to the Internet)
– Ethernet (Connection via Network Cable – Disconnected)
– VMWare adapters
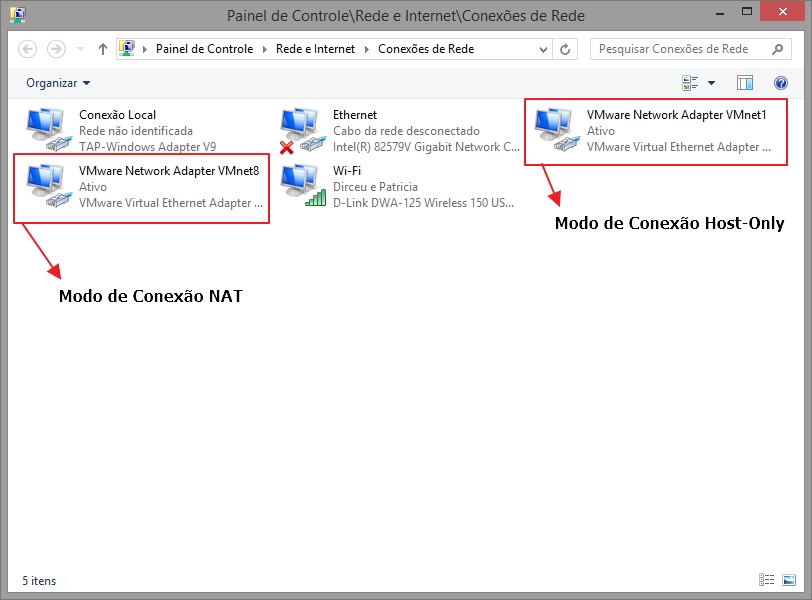
Notice that VMware Player created 2 network adapters for it to connect to:
– VMware Network Adapter VMnet1 for connection in Host-Only mode
– VMware Network Adapter VMnet8 for connection in NAT mode
The interface used by Bridge mode is VMNet0, which is not physical but virtual, where it is a pointer to a physical network adapter. The problem is that in environments with multiple adapters, this VMnet0 virtual connection may end up pointing to a network adapter that does not have an Internet connection and as a result, you will not be able to use your VM in Bridge mode.
To make our problem a little more difficult, the installation of VMware Player DOES NOT come with the virtual network configuration utility (Virtual Network Editor – vmnetcfg.exe).
Resolving complications and using the VM in Bridge mode
The first step we must do is copy the virtual network configuration utility to the VMware Player installation directory. Download the file vmnetcfg for VMware Player 7 and extract it to your VMware Player installation folder.
Now open the extracted file (vmnetcfg.exe) with Administrator privileges and you will see a screen like this:
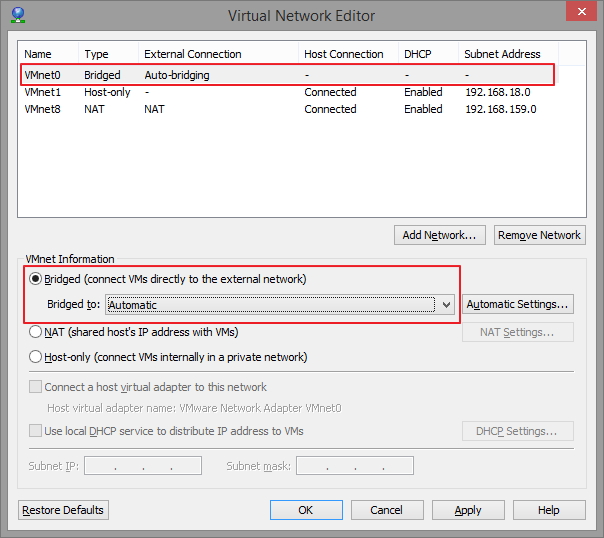
Since the settings are set to automatic, it is probably pointing to a connectionless adapter. Now, I'm going to change the point to the network adapter on my physical machine that is actually connected to the Internet:
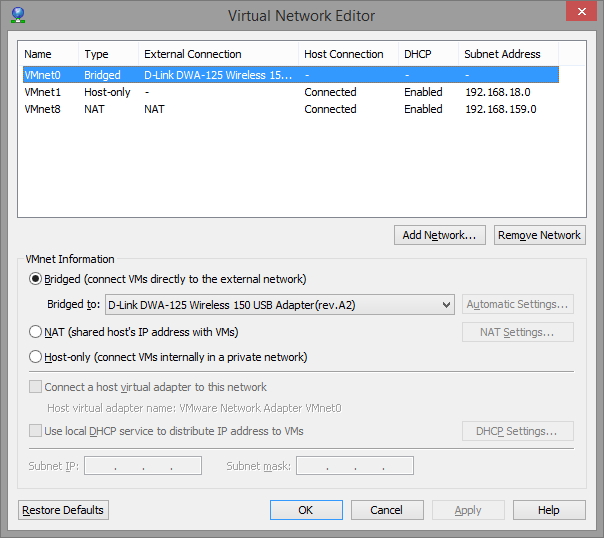
After the changes made, just restart the VM and it will have access to the network and internet!

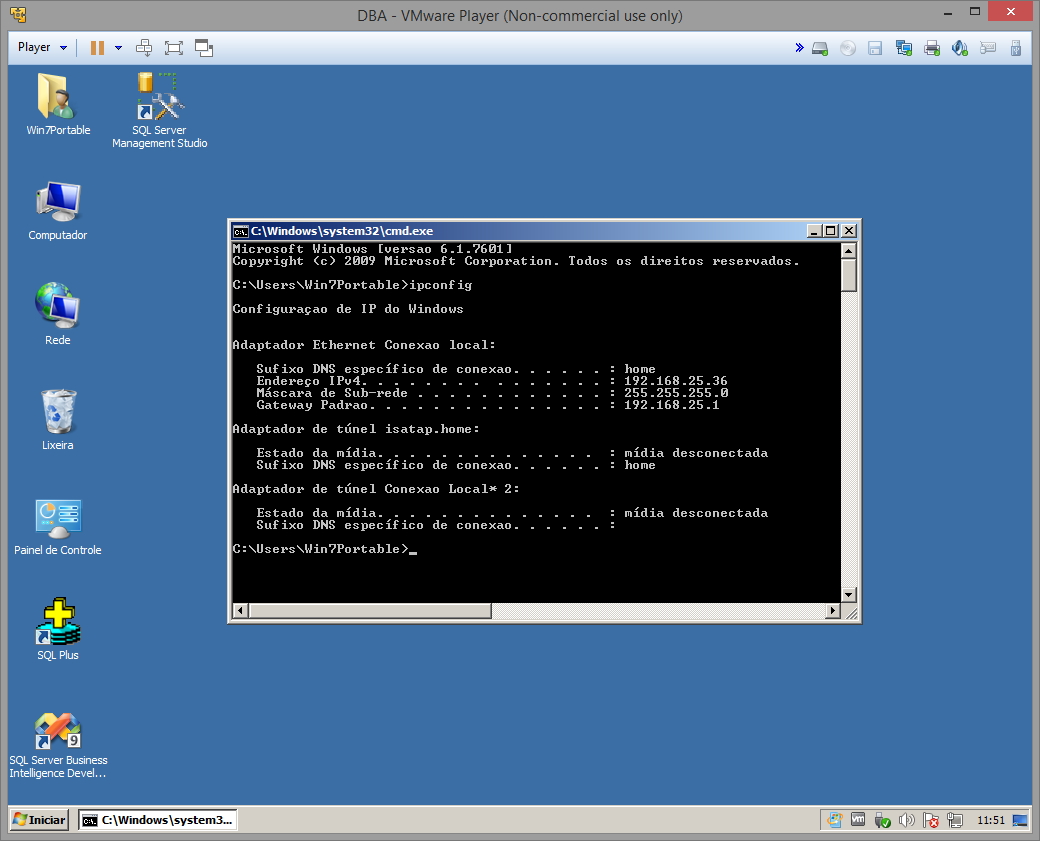
IP configuration on a VM in Bridge connection mode:
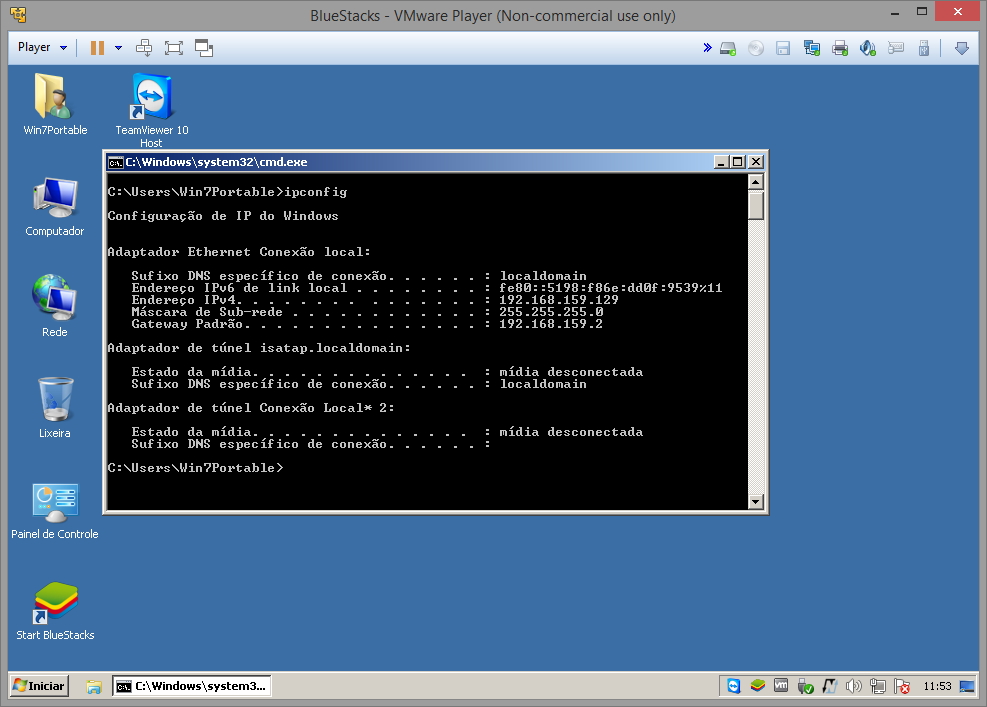
IP configuration on a VM in NAT connection mode:
That's it, folks!
I hope you enjoyed the post and see you next time!
If you also want to use VMware Player (which is free), but don't know how or are having difficulty installing, access the post Creating a virtual machine with VMware Player
UPDATE 03/22/2016:
vmnetcfg For VMware Player 12.1.0

Comentários (0)
Carregando comentários…