In this post, I will demonstrate how to install Oracle Database 11g in the Windows environment, which is widely used today due to the ease and practicality of the Microsoft operating system.
- Run the file setup.exe to start the installation

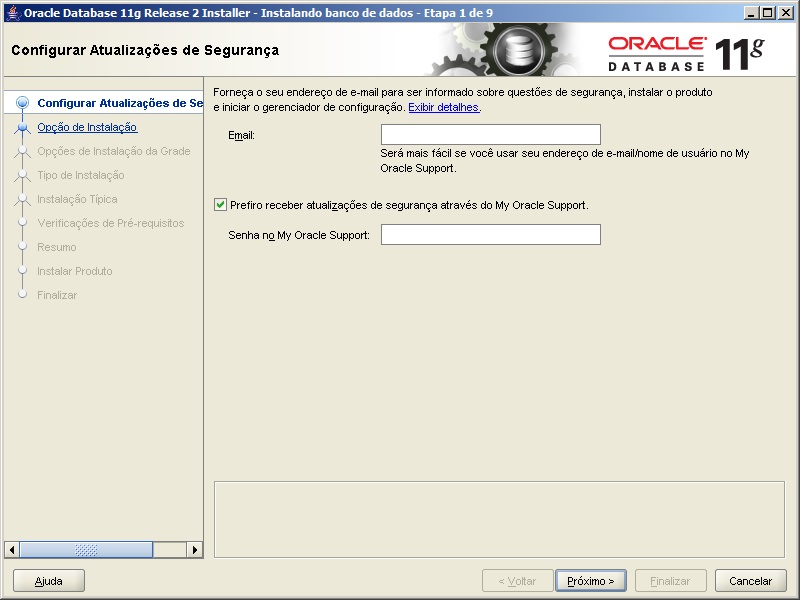
Oracle - Installation 1 - On the first installation screen, we can define an email to receive updates from Oracle. This step can be skipped if you wish.
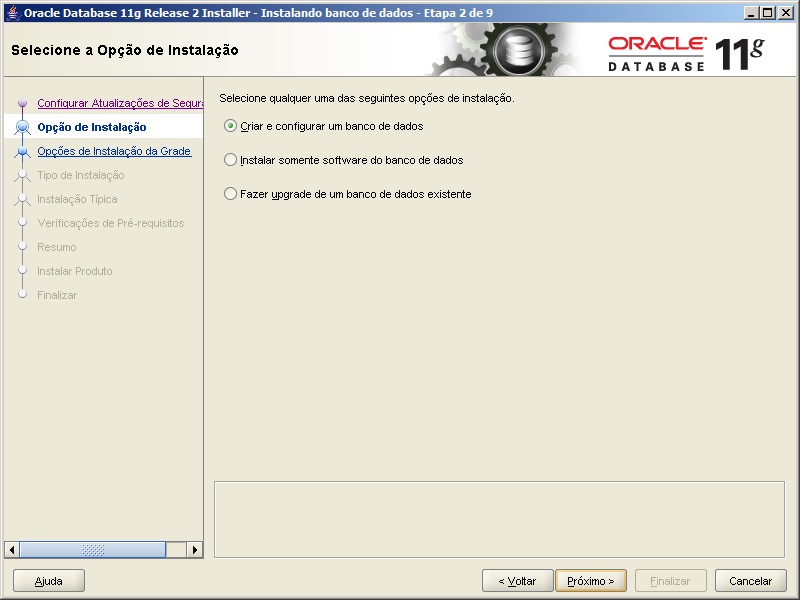
Oracle - Installation 2 - In step 2, we can choose the installation type:
– Create and configure a database: Choose this option to create a new database along with the sample schemas.
– Install database software only: Choose this option to install the database binaries. To configure the database, you must run the Oracle Database Configuration Wizard after installing the software.
– Upgrade an existing database: This option installs the software binaries on a new Oracle home. At the end of the installation, you can upgrade the existing database.
Oracle - Installation 3 - In step 3, we can choose the installation class of our bank
– Desktop Class: This option includes an initial database and allows for minimal configuration. This option is designed for those who want to quickly install and run the database.
– Server Class – This option allows for more advanced configuration options. Advanced configuration options available when using this option include Oracle RAC, Automatic Storage Management, backup and recovery configuration, integration with Enterprise Manager Grid Control, and finer memory tuning, among many others.
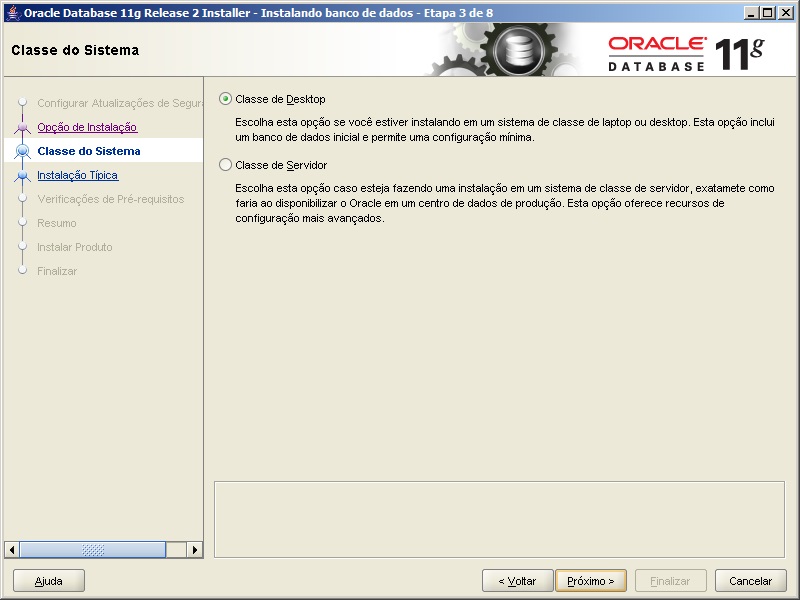
Oracle - Installation 4 - Let’s select the “Server Class” option.
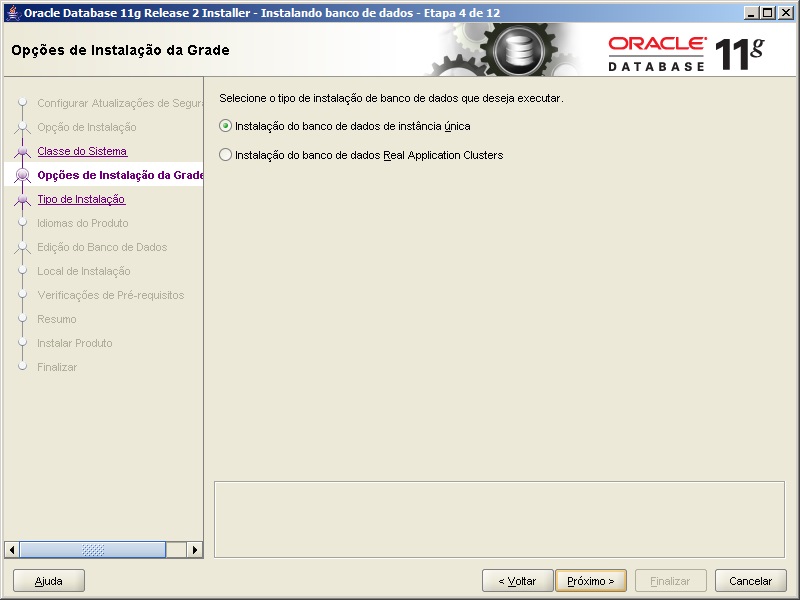
- In step 4, we will define whether our database will be a single instance or a RAC (Real Application Clusters) installation, which requires more than one server. I will install it as a single instance and then make a RAC installation post.
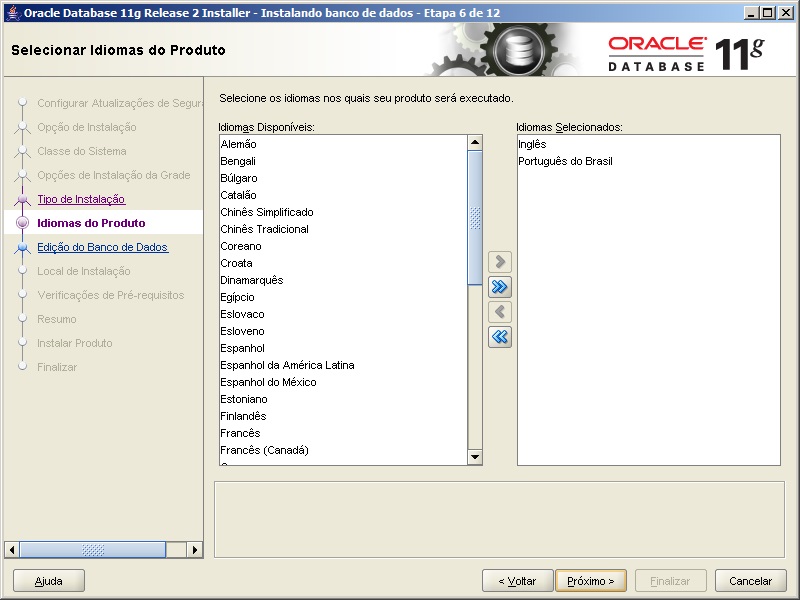
Oracle - Installation 5 - In step 5, we can choose the language of the product to be installed.
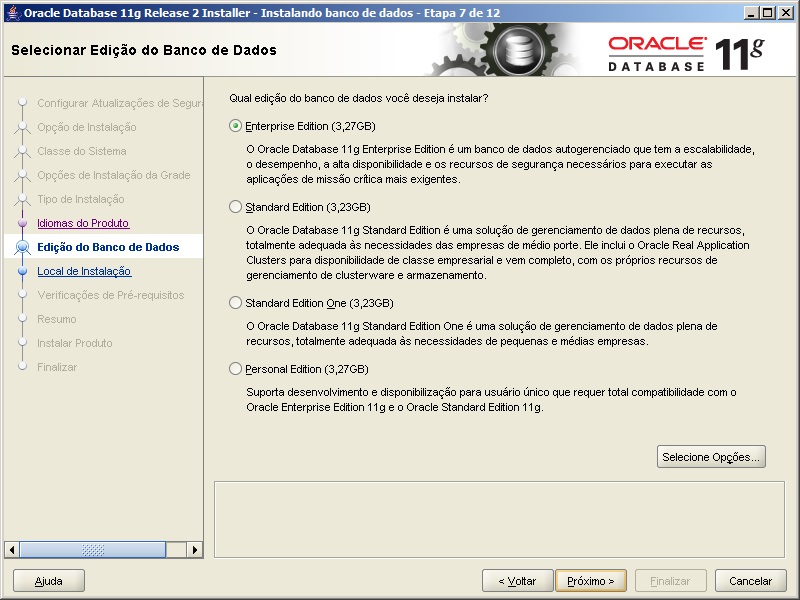
Oracle - Installation 6 - In step 7, we must choose the database edition and you must select the edition in which you have a license to use. In the case of the example, I will use the “Standard Edition” edition.
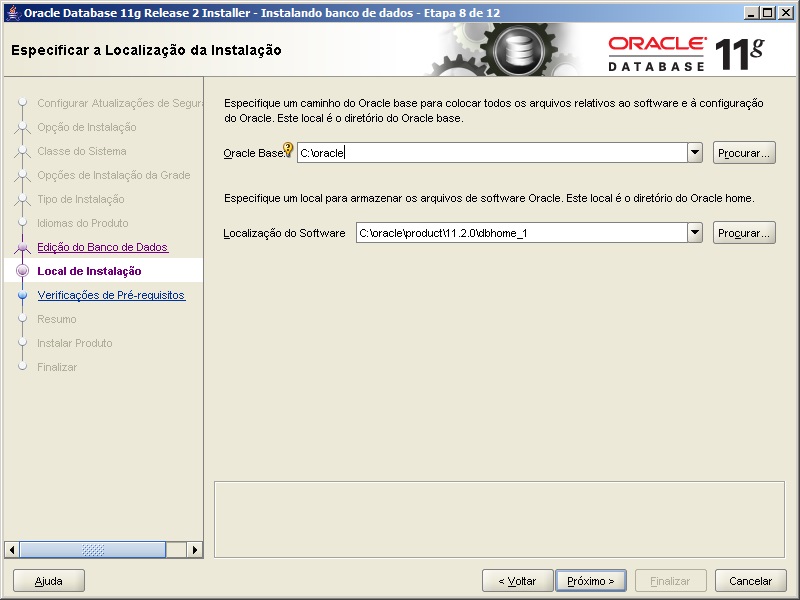
Oracle - Installation 7 - In step 8, we select the installation location of the Oracle Database 11g binaries.
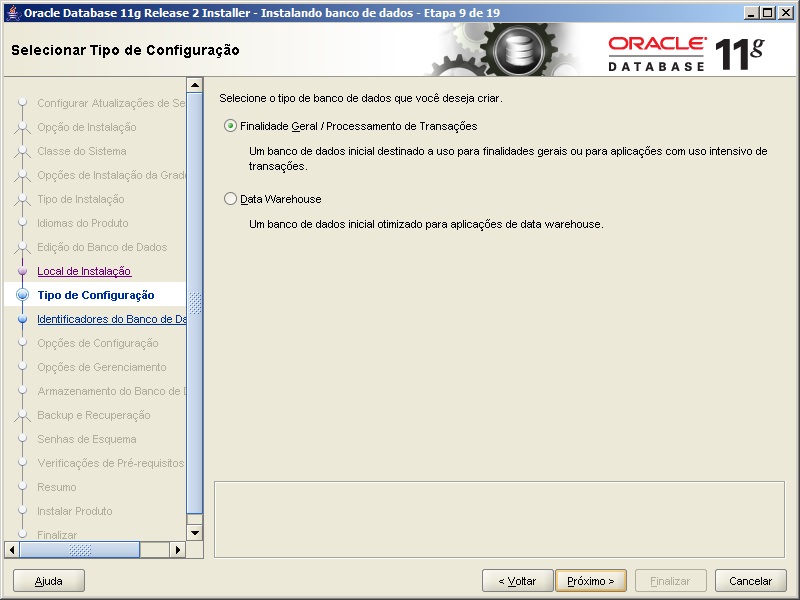
Oracle - Installation 8 - In step 9, we will define the purpose type of the database. In the example, I will select the option “General Purpose / Transaction Processing”
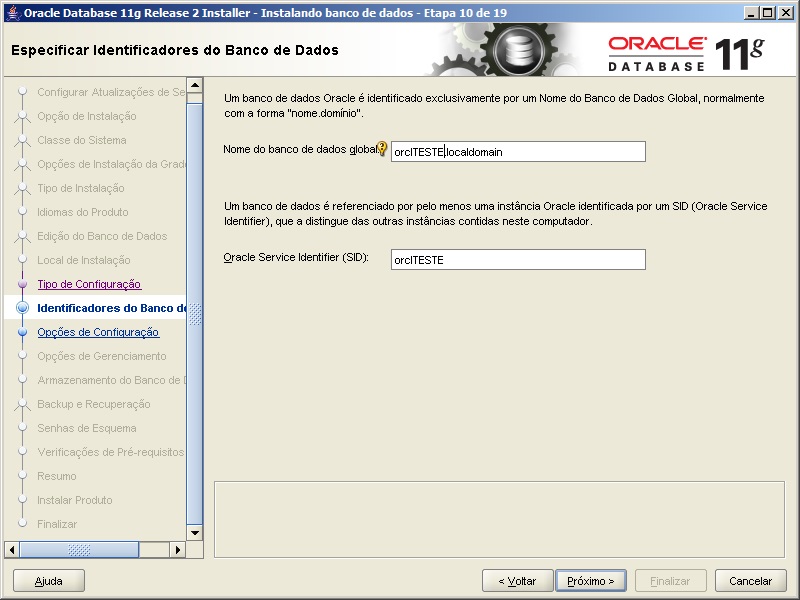
Oracle - Installation 9 - In step 11 is where we define the name of the database and the name of the instance we are installing. The global name is unique per database and the SID is unique per instance, remembering that a database can have multiple instances and the SID will be different for each of the instances.
Oracle - Installation 11 - In step 11, we can configure the memory settings of Oracle Database 11g. Oracle Universal Installer calculates and displays a default value for the allocation of the Allocated Memory spin box and adjusts the slider accordingly. The slider values are also limited to maximum and minimum values based on available physical memory. You can use the slider or spin box to specify the value (MB) for the amount of memory you want to allocate to the database according to the database requirements. The Enable Automatic Memory Management option is selected by default. This option activates the database so that it automatically distributes the allocated memory between the SGA (System Global Area) and the PGA (Program Global Area). If you deselect this option, the SGA and PGA must be sized manually. If this option is selected, the status of memory distribution between memory areas will be displayed as AUTO on the screen. If the option is not selected, the memory distribution between memory areas will be static. The ratio of allocated memory distribution between memory areas depends on the database configuration you selected. According to Oracle documentation, the memory distribution ratio varies depending on the database types:
– General Purpose / Transaction Processing: SGA Target: 75% / Aggregate PGA Target: 25%
– Data Warehousing SGA Target: 60% PGA Target / Aggregate: 40% 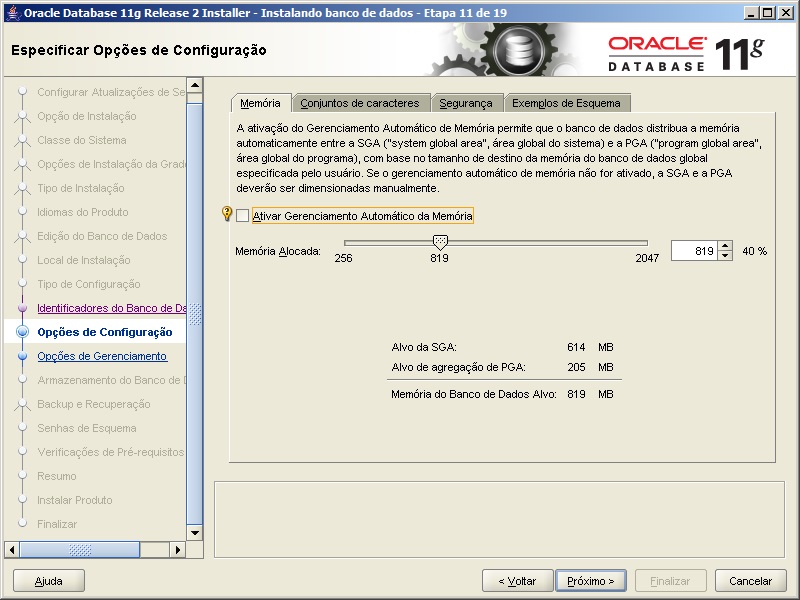
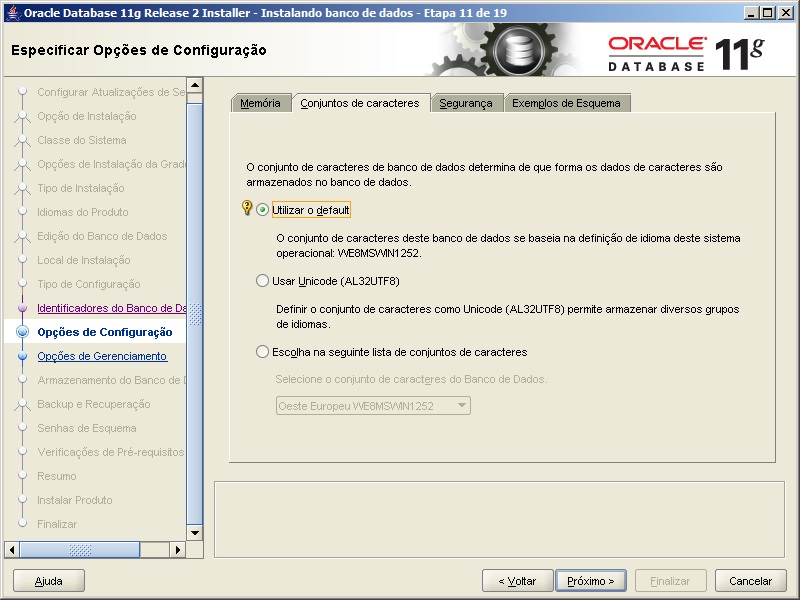
Oracle - Installation 12 - In the “Character Set” tab, we can define the encoding of the characters in our database. You can use the default, which would be WE8MSWIN1252 (ISO-8859), but as the character encoding standard used in the development of systems and Web applications is UTF-8, I will select the option “Use Unicode” (remember to validate with your development team which standard is used, to avoid charset conversions in the Application x Database interaction).
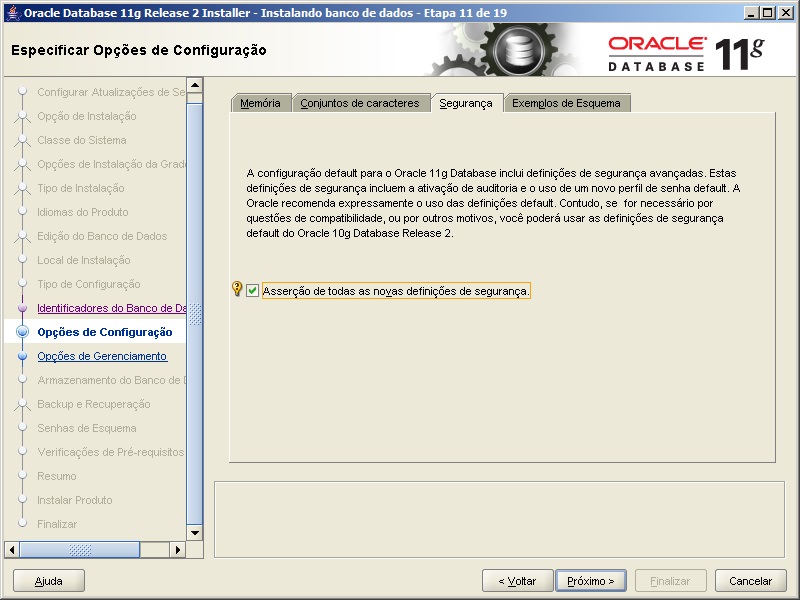
Oracle - Installation 13 - In the “Security” tab, we can select the option to activate Oracle’s default security settings, which includes enabling auditing and using a new password profile (Oracle recommends that you use the default settings).
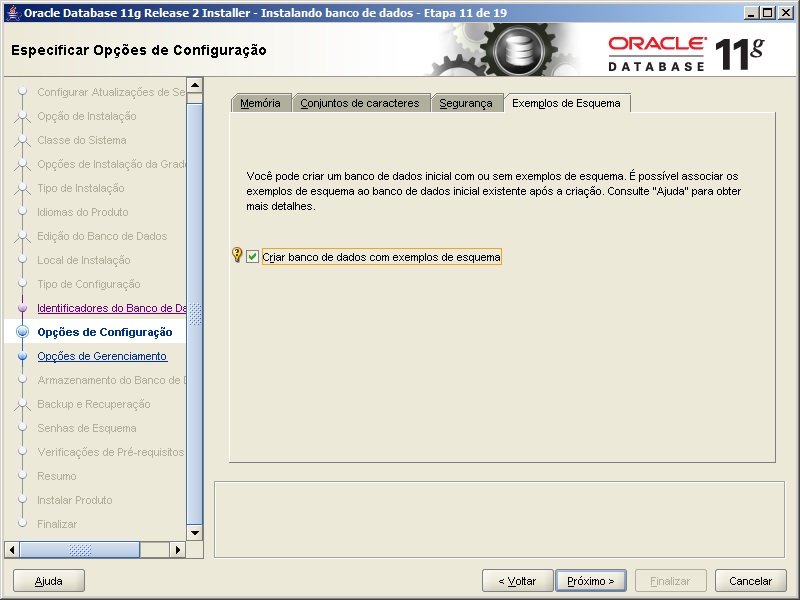
Oracle - Installation 14 - In the “Schema examples” tab, you can select this option so that an example schema of your database can be created to facilitate testing and studies. If you choose to install the schema examples, the Oracle Database Configuration Assistant creates the EXAMPLES tablespace in the database, requiring 150 MB of disk space. If you are using raw devices for database storage, you must create and specify a separate raw device for this tablespace. If you choose not to install the schema examples, you can manually create them in the database after installation. For obvious reasons, I do not recommend checking this option in Production environments.
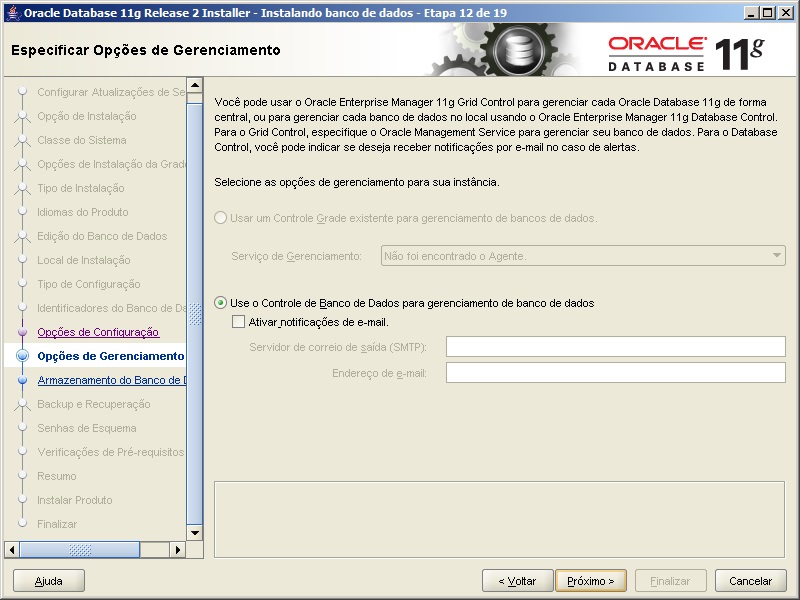
Oracle - Installation 15 - In step 12, we can define whether we will use Oracle Enterprise Manager 11g Grid Control, which is a tool to manage all Oracle databases on your network in a centralized way or whether we will use local Database Control, allowing notifications to be sent by email.
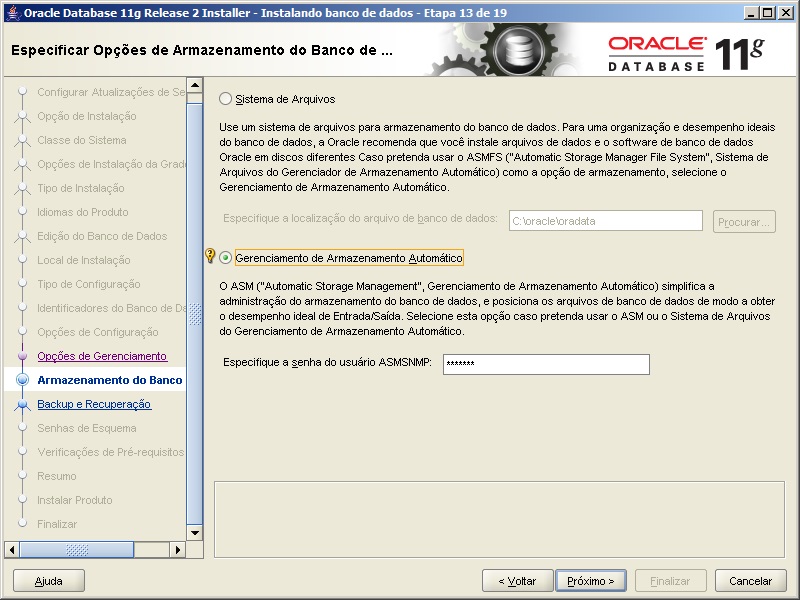
Oracle - Installation 16 - In step 13, the Oracle Database 11g file system is defined. By selecting the first option, the operating system manages the I/O flow and the files are created physically on the disk. In ASM, the database itself manages the I/O flow and this generally translates into gains in performance, security and reliability. Unfortunately, my VM is 32-bit and ASM is not supported on that platform. Therefore, I will select the first option.
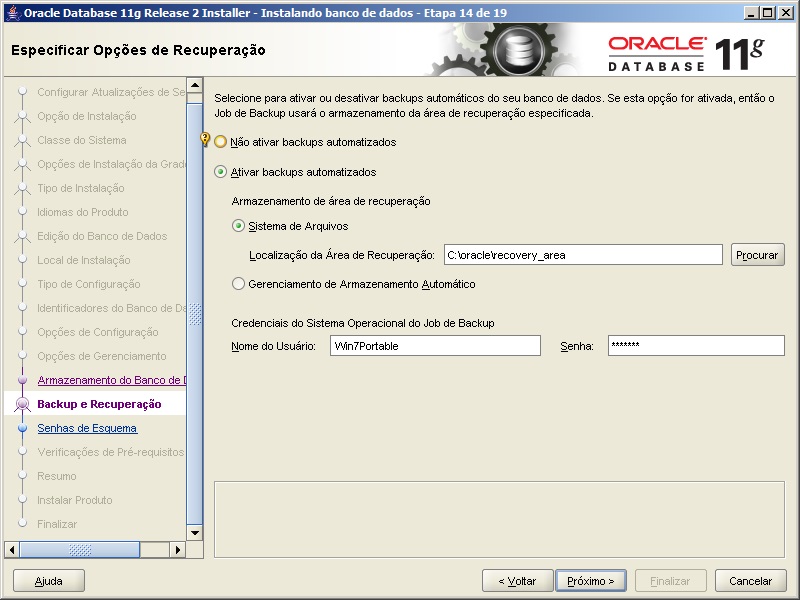
- In step 14, we set the automatic database backup options
-
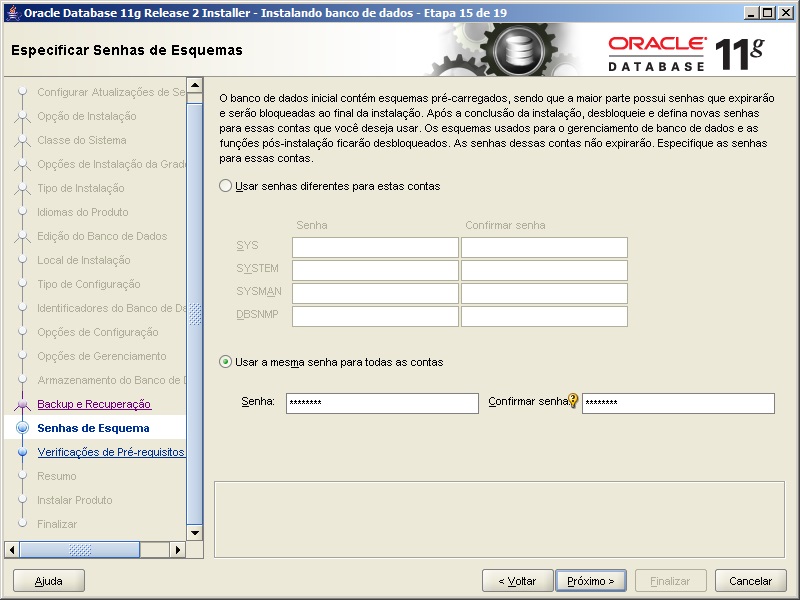
Oracle - Installation 19 - In step 15, the passwords for the Oracle Database 11g system schemas are defined. We have the option to set a password for each scheme or use the same password for everyone. For Production environments, I recommend creating a password for each scheme for security reasons.
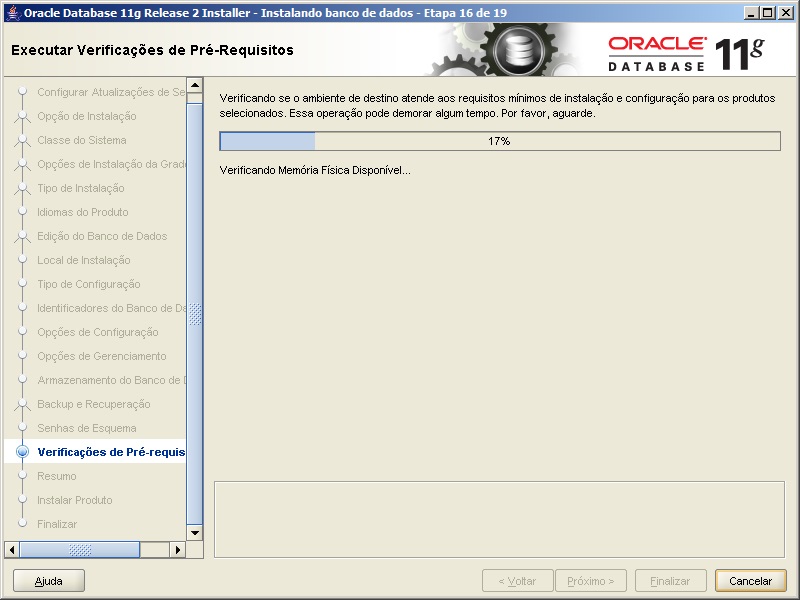
Oracle - Installation 20 - In step 16, Oracle Universal Installer will evaluate your machine to verify the minimum requirements for installation
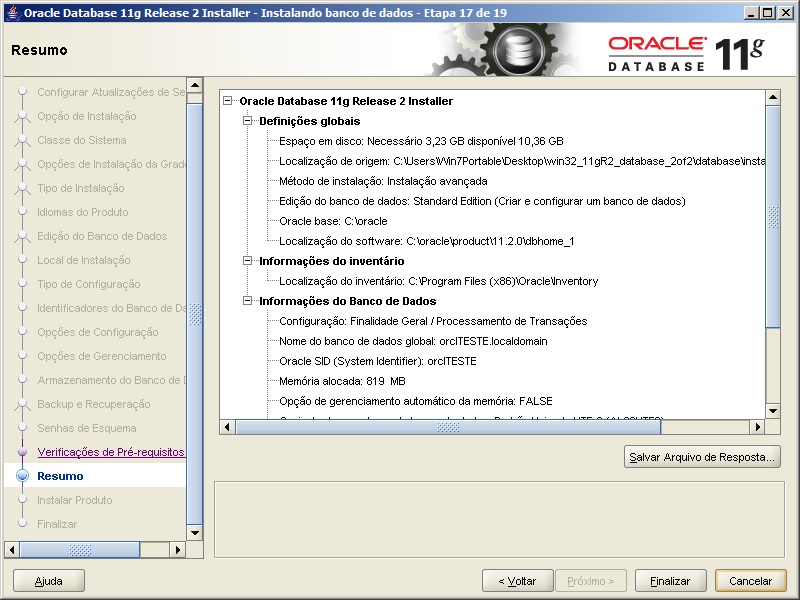
Oracle - Installation 21 - In step 17, Oracle Universal Installer will show you a summary of the selected configurations.
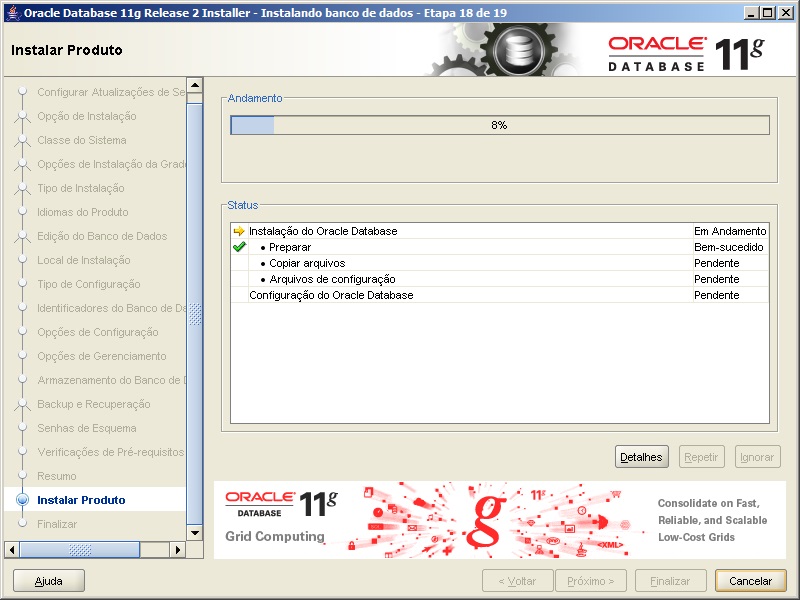
Oracle - Installation 22 - In step 18, the Oracle Database 11g installation progress will be shown.
Oracle - Installation 23 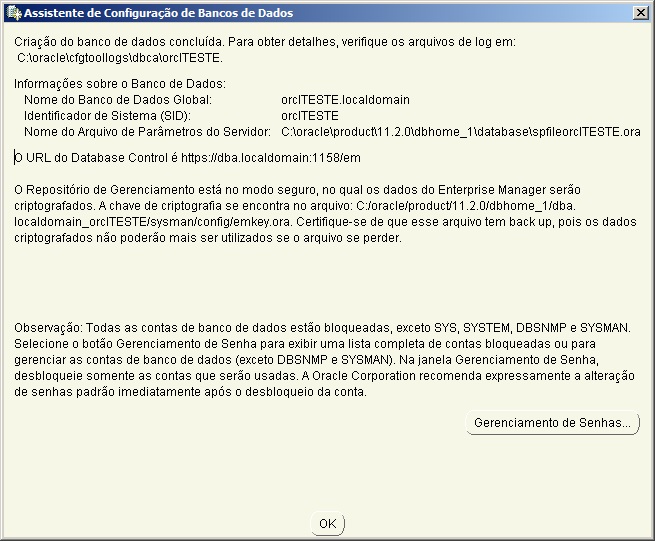
Oracle - Installation 24 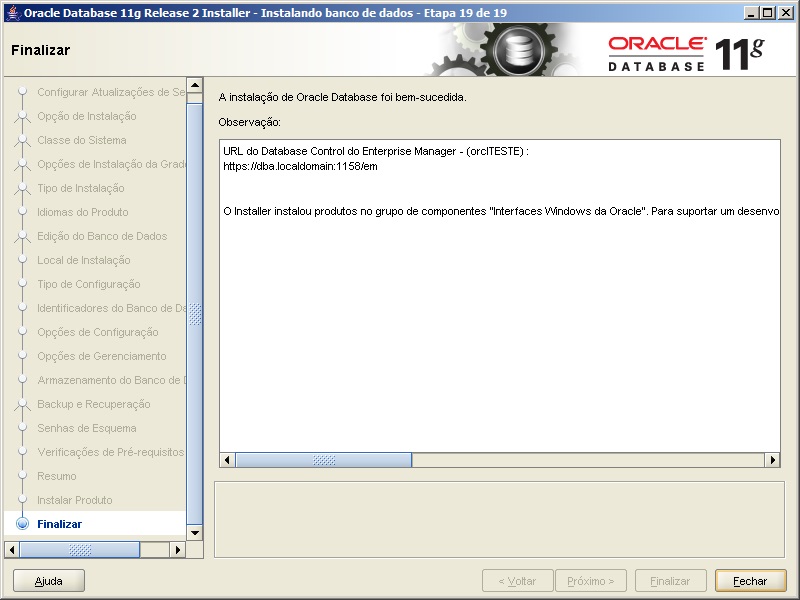
Oracle - Installation 25 - Oracle Database 11g installed successfully. Let's now test the connection with the bank

Oracle - Installation 26 - Everything ok with the installation of Oracle Database 11g


Configuring to allow remote connections
- Before starting, we need to clarify 3 key concepts:
- sqlnet.ora: Configuration file that allows you to define Oracle Client connection options, such as authentication method (SQLNET.AUTHENTICATION_SERVICES= (NTS)), instance name resolution method (NAMES.DIRECTORY_PATH=(TNSNAMES, EZCONNECT)), default domain, etc.
- tnsnames.ora: Settings file that allows you to define the connection string for each instance you will access.
Standard format: Custom_Name.Domain=(DESCRIPTION=(ADDRESS_LIST=(ADDRESS=(PROTOCOL=TCP)(HOST=machine_name.domain)(PORT=1521)))(CONNECT_DATA=(SERVICE_NAME=OracleSID_name)))
Standard format with active loadbalance: Custom_Name.domain=(description=(address_list=(load_balance=yes)(address=(protocol=tcp)(host=machine_name.domain)(port=1521)))(connect_data=(service_name=OracleSID_name)(failover_mode=(type=select)(method=basic)))) - listener.ora: Oracle Database configuration file that allows remote connections to your database.
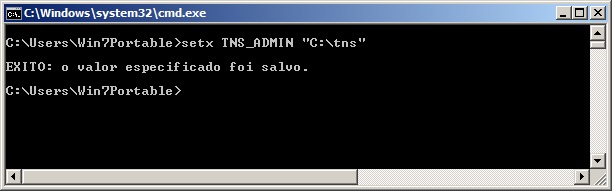
- Define the default directory to store client configurations (tnsnames.ora, sqlnet.ora and listener.ora). To do this, we will create an environment variable in Windows. This way, you can manually define the location where your tnsnames.ora file will be located, even if you have more than one version of the Oracle Client installed on your machine, preventing each version of the Oracle Client from using different settings. If you do not want to use this option, the default directory where the sqlnet.ora, listener.ora files are located and where you should create your tnsnames.ora is C:\oracle\product\11.2.0\dbhome_1\NETWORK\ADMIN\
Oracle Client - Configuration 1 - Another way to configure this is by going to Start Menu > My Computer > Right Click > Properties.
After that, click on the “Advanced system settings” option > “Environment Variables” button and add the record on this screen 
Oracle Client - Configuration 2 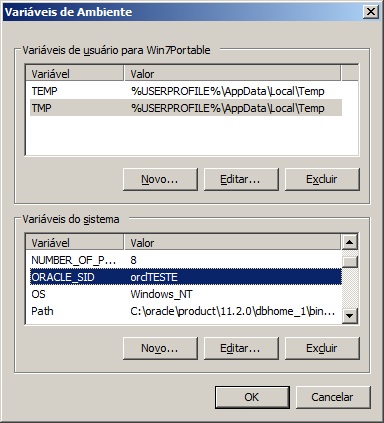
Oracle Client - Configuration 3 - Listener.ora file example:
# Meu LISTENER LISTENER = (DESCRIPTION_LIST = (DESCRIPTION = (ADDRESS = (PROTOCOL = TCP)(HOST = dba)(PORT = 1521)) ) ) ADR_BASE_LISTENER = C:\oracle - Open Windows Service Management (Start > Run > services.msc) and start the OracleServices
and OracleOraDb11g_home1TNSListener services - Open the DOS prompt and type the command:
lsnrctl statusto validate that the listener is up and running
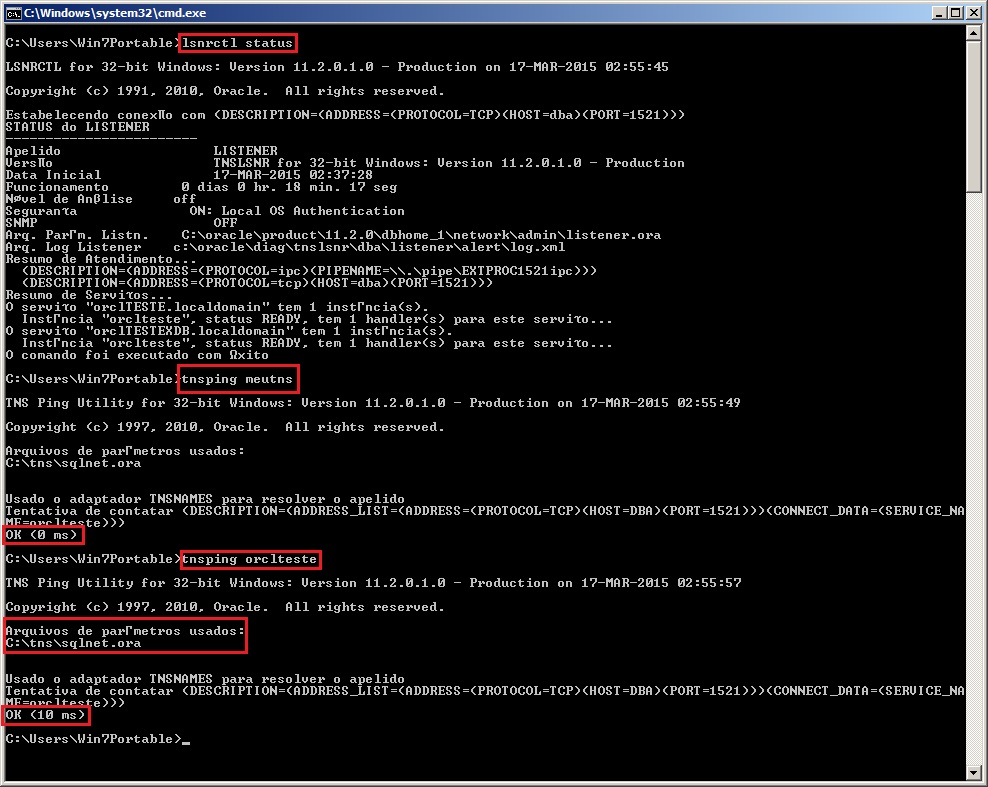
Oracle Client - Configuration 4


Note: I do not recommend using Oracle with Windows in Production environments, as the performance and stability of the database running on Linux (especially Oracle Linux on the x64 platform or Solaris on the x86 platform) is much superior. In the future I will create a post on installing Oracle on Linux 🙂

Comentários (0)
Carregando comentários…