Introduction
In today's post, I would like to demonstrate to you how to archive historical tables in Azure with Stretch Database, available from SQL Server 2016. Stretch Database is a DBMS feature, which migrates your cold data (data that is not changed or consulted frequently) automatically, transparently and securely to the Microsoft Azure cloud, as the data is stored encrypted in Azure (using the Always Encrypted) and allow you to access cold data (in Azure) and hot data (local) in a transparent way for the application, that is, the entire process is done by the Database Engine, in a completely transparent way, where in the same query, you could be querying data in the cloud and local without even realizing it.
Among the advantages of using Stretch Database is the reduction in local disk space consumption, in hot data, since historical data (which tends to be the largest volume of data) has been moved to the cloud. This also guarantees faster querying of hot data (fewer pages to process) and facilitates the maintenance of this data, since backups will be carried out faster, as well as several other administrative tasks, such as rebuilding indexes, checkdb, etc.
How Stretch Database works
After you enable Stretch Database for a SQL Server instance and a database, and select at least one table, it silently starts migrating cold data to Azure.
- If you store cold data in a separate table, you can migrate the entire table.
- If the table contains both hot and cold data, you can specify a filter function to select the rows to migrate.
- You don't need to change existing queries and client applications. You continue to have direct access to local and remote data, even during data migration. There is a small amount of latency for remote queries, but you may only be affected by this latency when querying cold data, which is in Azure.
- Stretch Database ensures that no data will be lost in case a failure occurs during the migration. It also has retry logic to handle connection issues that may occur during migration. The DMV sys.dm_db_rda_migration_status provides the current migration status of the data.
- You can pause data migration to troubleshoot local server issues or to maximize available network bandwidth.
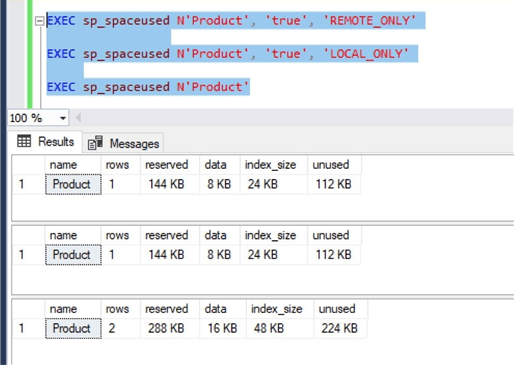
To ensure that the data is actually stored in the cloud, we can use the sp_spaceused to identify how many rows and volume of data exist in the table, allowing you to also filter local and remote data:
How to implement Stretch Database using SSMS
View contentThe first step is to select the table you would like to store in the cloud through the “Object Explorer”, right-click and select the “Stretch Database” menu and click on the “Enable” option.

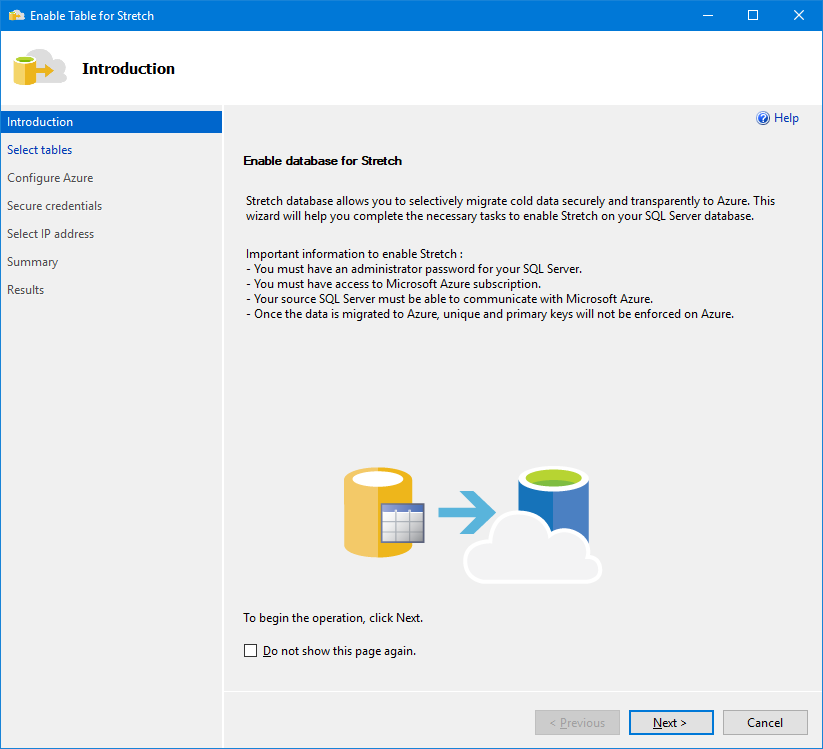
The first screen of the Stretch Database Wizard displays a summary of how this feature will be configured.
If your table has any resource that is a Stretch Database limitation, you will come across this screen.

In the case of the SalesOrderHeader table, the limitations that are preventing the use of Stretch Database are check, default and foreign keys constraints. To get around this, I will create a new table (SalesOrderHeader2) with the contents of the original table (SalesOrderHeader), but without the contraints.

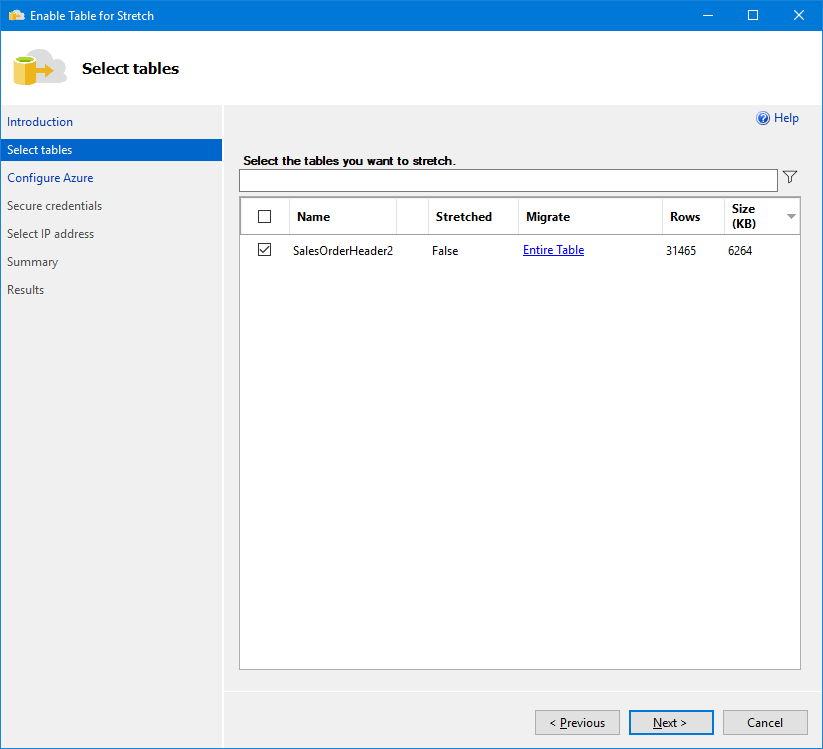
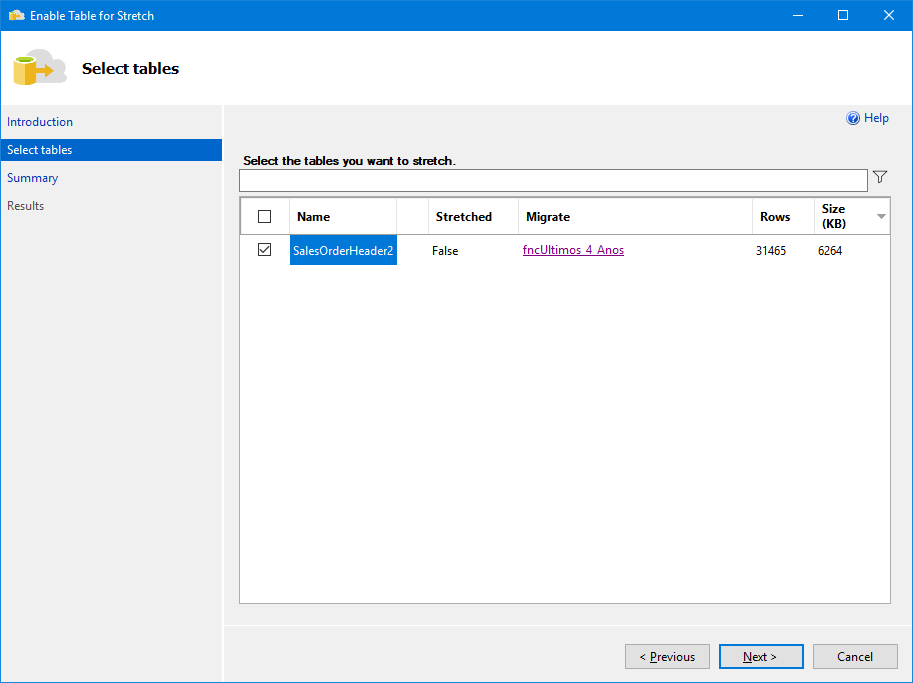
Now, let's try to activate Stretch Database on the newly created table. Note that the default option is “Entire Table”, that is, the entire table will be stored in the cloud. If you want to keep part of the data on the local infrastructure, even to have better performance in the most frequent queries, click on this link to open the cloud migration configuration screen.
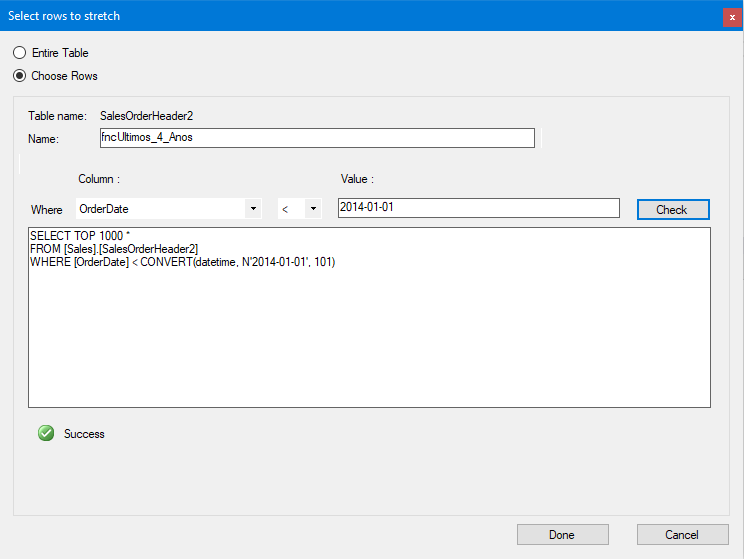
If you want to customize the way of identifying “cold” data (little-used data – stored in the cloud) and “hot” data (frequently used data – stored on-site), you can select the “Choose Rows” option, define a name for this filter and choose the column and expression that will be used to filter the data, as per the example below:
This is what the Stretch Database configuration screen looks like after creating a filter to select the lines that will be migrated:
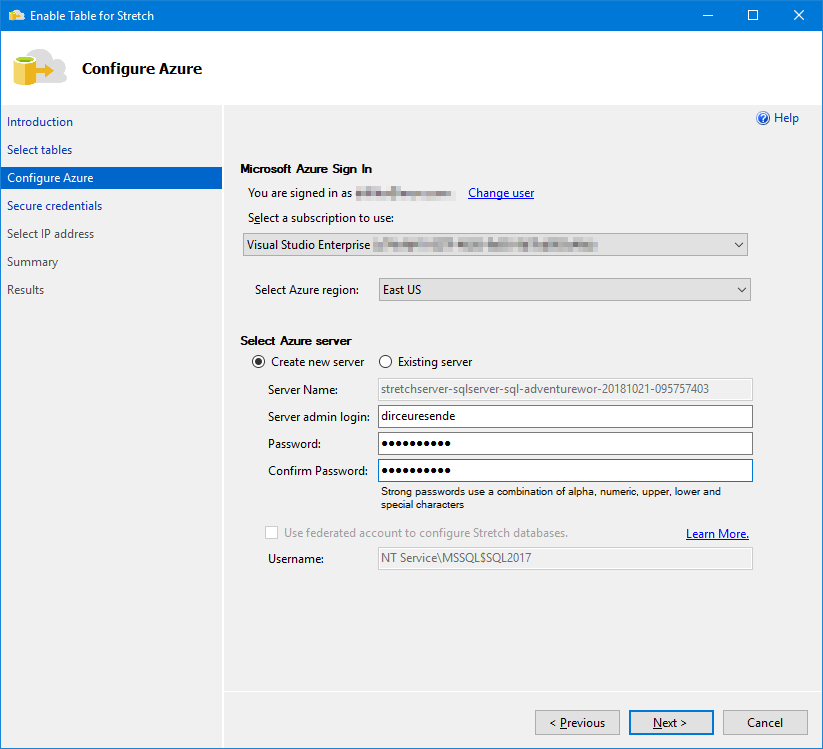
On this screen, we must configure the Azure account that will store the “cold” data from the source table.
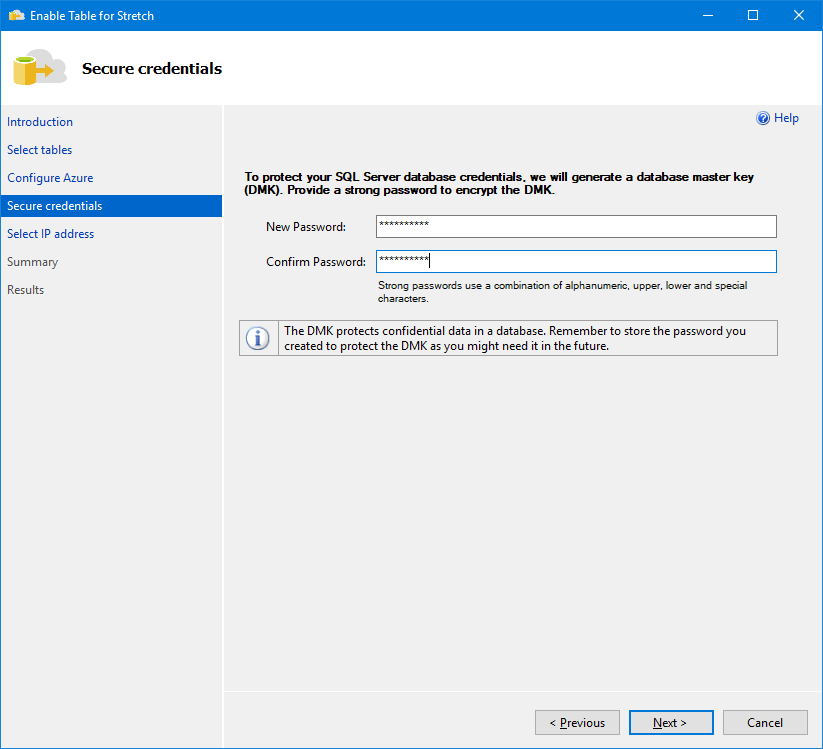
On this screen, we will configure a strong password for the database master key (DMK), which will be used to encrypt data in the cloud (using Always Encrypted, all transparently for you)
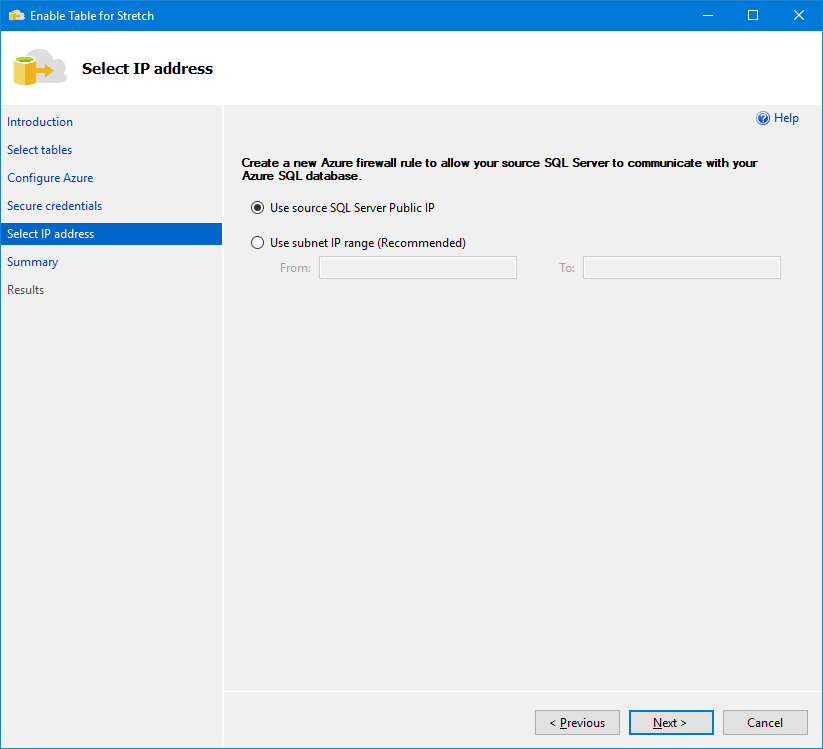
And here, we can configure the Firewall for this database, either using your current IP or providing a range of IPs to allow access. This setting largely depends on your network, so it can be changed according to your scenario. If you would like to change these firewall settings after activating Stretch Database, this can be done through the Azure Portal.
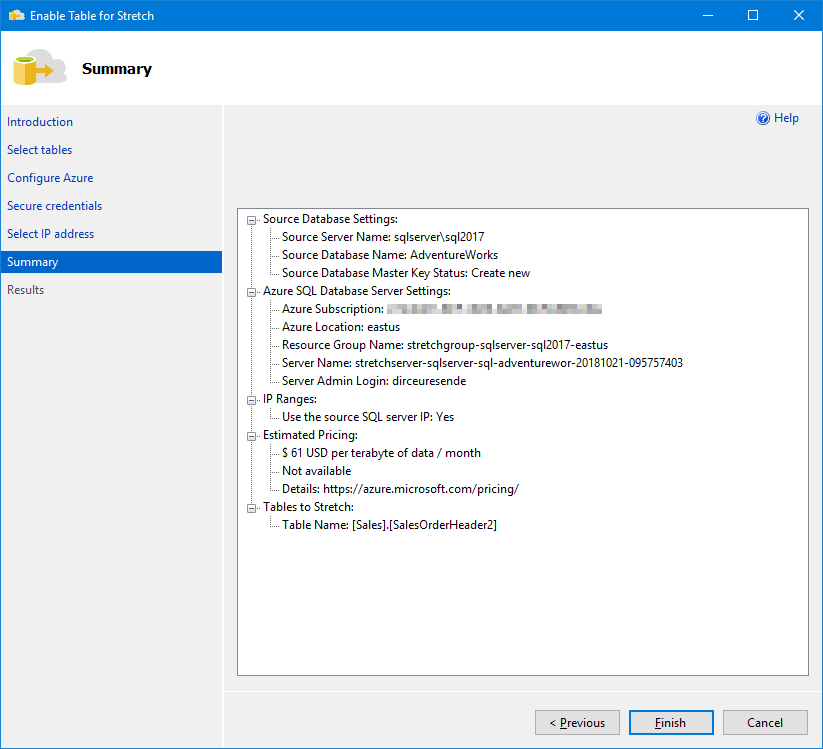
Summary of the actions that will be carried out:
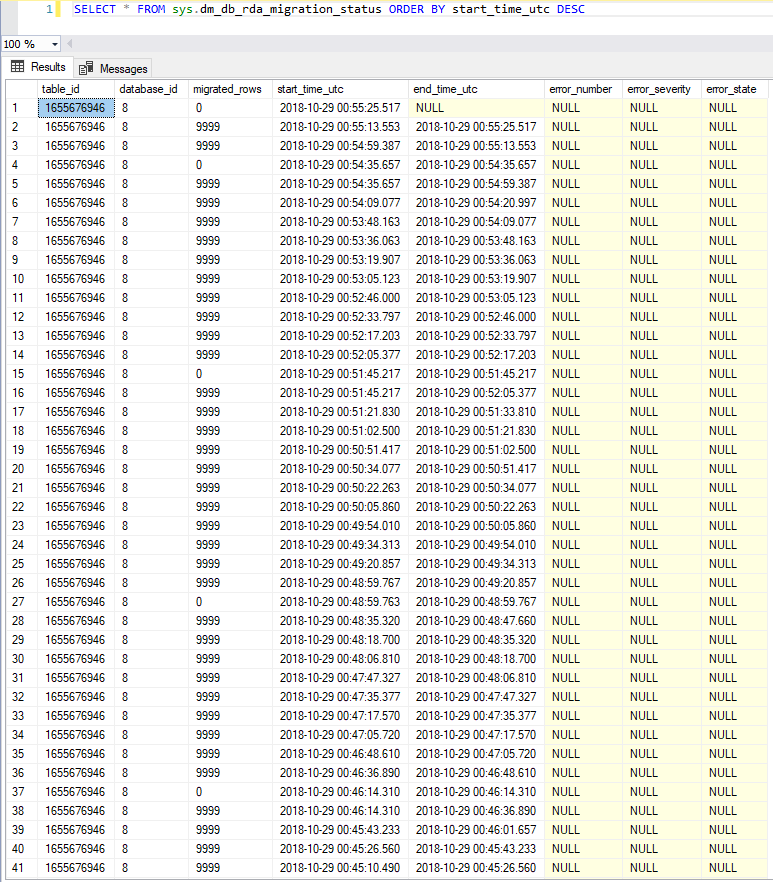
Data migration completed successfully! Now just wait for the data migration to finish in the background, in a completely transparent way. To monitor the progress of data transfer, use the DMV sys.dm_db_rda_migration_status:
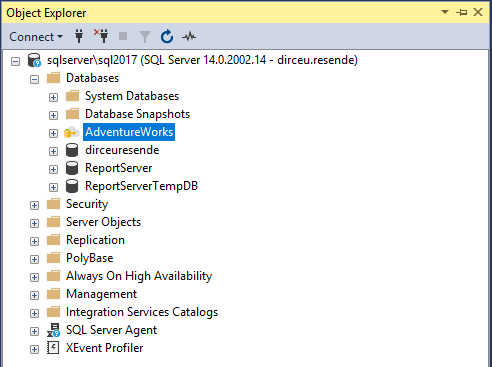
Note that after creating the Stretch Database on at least one table, the database icon changes on the SSMS Object Explorer screen.
Additionally, 2 new objects are created: 1 External Data Source (Stretch Server) and 1 classification function (fncUltimos_4_Anos)

Video demonstration
How to implement Stretch Database using Transact-SQL (T-SQL)
View contentThe Remote Query operator in the execution plan
View content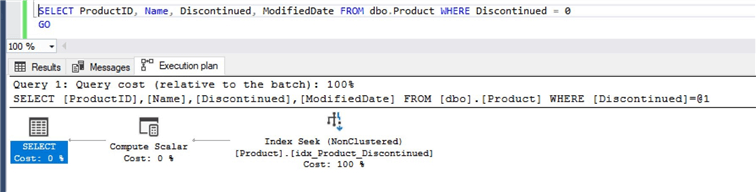
However, when we activate Stretch on this table, we see that when querying the data on the remote server, the “Remote Query” operator becomes part of our execution plan. This occurs both when you query the entire table and when you query data that is only on the remote server.
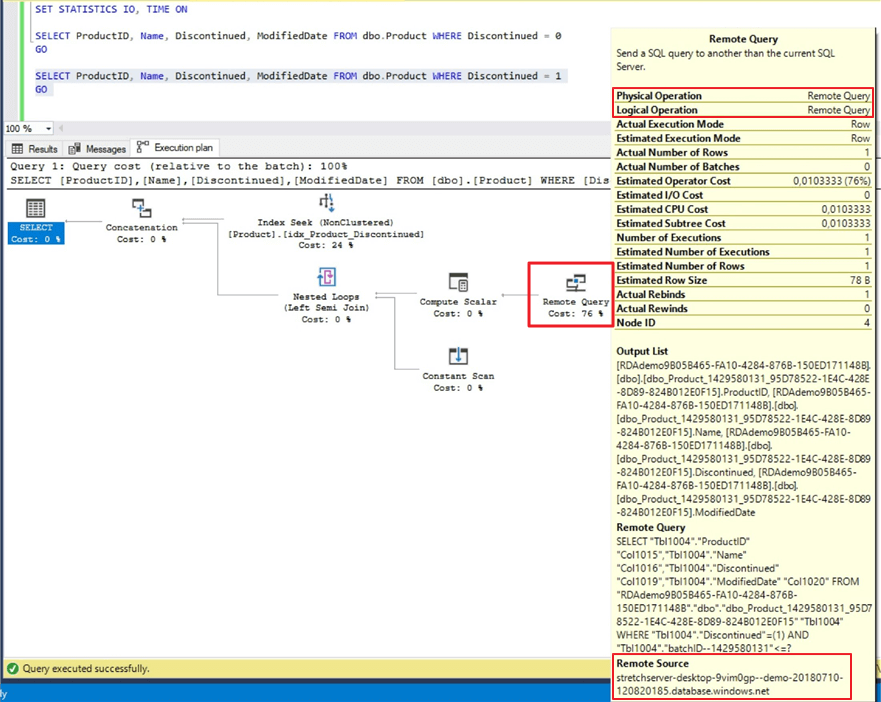
If your query result is only stored locally, the “Remote Query” operator will not appear in the execution plan.
In the case of the example above, the “Discontinued” column was used as a filter to determine the data that should be migrated or not (1 = Migrates, 0 = Remains local), that is, if no filter is performed (bringing the entire table) or some other filter that returns data with this flag with both the values 0 and 1 or just the value 1, the “Remote Query” operator will be present, as part of the data will be on the remote server.
If a query only returns data with this flag = 0, the “Remote Query” operator will not be part of the execution plan, as only data that is in the local infrastructure will be returned.
How to pause, disable and resume data migration in Stretch Database
View content
How to pause data migration
To pause data migration, use the command below:
USE AdventureWorks
GO

ALTER TABLE SalesOrderHeader2
    SET ( REMOTE_DATA_ARCHIVE ( MIGRATION_STATE = PAUSED ) );
GO
How to resume/continue/remote data migration
To resume/resume/continue data migration, use the command below:
USE AdventureWorks
GO

ALTER TABLE SalesOrderHeader2
    SET ( REMOTE_DATA_ARCHIVE ( MIGRATION_STATE = OUTBOUND ) );
GO
How to disable data migration for a table
To disable data migration and bring cloud-migrated data back to your on-premises infrastructure (copying remote data to the Azure table back to SQL Server incurs data transfer costs), use the command below:
USE AdventureWorks
GO

ALTER TABLE SalesOrderHeader2
    SET ( REMOTE_DATA_ARCHIVE ( MIGRATION_STATE = INBOUND ) );
GO
To disable data migration and abandon data migrated to the cloud, use the command below:
USE AdventureWorks
GO

ALTER TABLE SalesOrderHeader2
    REMOTE_DATA_ARCHIVE = OFF_WITHOUT_DATA_RECOVERY (
        MIGRATION_STATE = PAUSED
    )
GO
Remember to Pause data migration on individual tables when you want to troubleshoot local server issues or to maximize available network bandwidth. Furthermore, disabling Stretch Database for a table or database does not delete the remote object. If you want to delete the remote table or remote database, drop it using the Azure Management Portal. Remote objects continue to incur Azure costs until you delete them.
How to disable Stretch Database for a database
To disable Stretch Database for a database, you will first need to disable Stretch for all individual tables that are enabled in that database. Use the sys.remote_data_archive_tables view to find out what these tables are.
After disabling Stretch for all tables, use the command below to disable Stretch for the database:
ALTER DATABASE AdventureWorks
    SET REMOTE_DATA_ARCHIVE = OFF
GO
Remember that disabling Stretch Database for a database does not delete the remote database. If you want to delete the remote database, drop it using the Azure Management Portal. The remote database continues to incur Azure costs until you delete it.
How to monitor data migration progress in Stretch Database
View content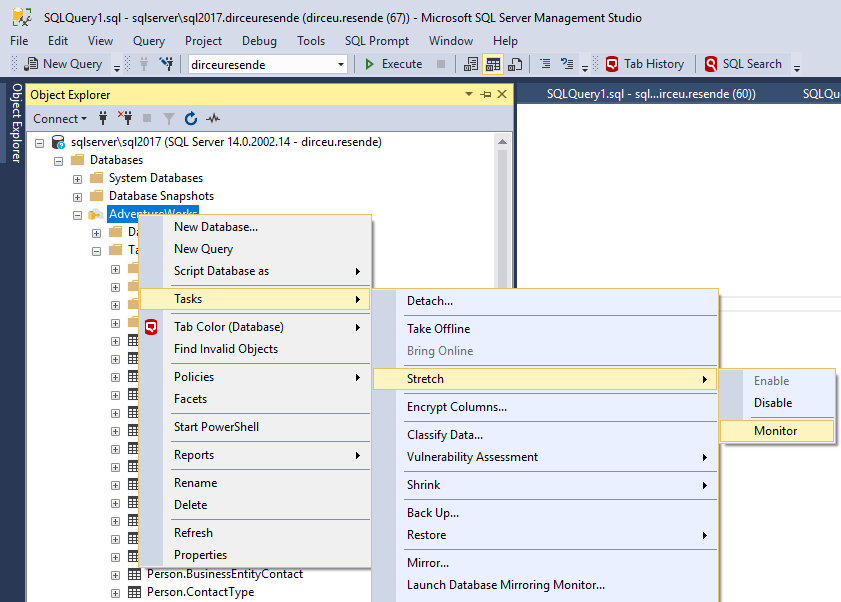
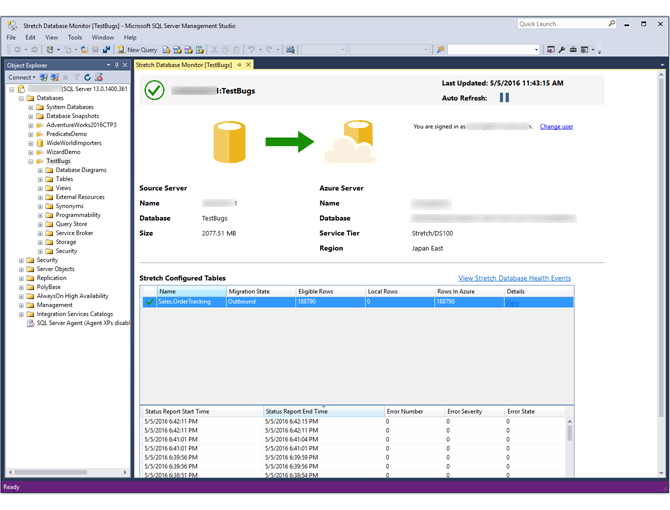
This way, a report will open where you can view details of the number of lines eligible for migration and how many have already been migrated, as well as the loads (batches of up to 9,999 records) carried out:
One way to monitor the progress of data migration using Transact-SQL (T-SQL) is by consulting the sys.dm_db_rda_migration_status view, which will return information for each load batch:
To see information about which databases have Stretch Database enabled, see the view sys.remote_data_archive_databases

or the view sys.remote_data_archive_tables to consult the tables that have the Stretch Database:

Backup and Restore of databases with Stretch Database
View contentLimitations of Stretch Database
View contentThe price of Stretch Database
View contentAs you can see in the image, the estimated cost is 61 dollars per Terabyte, per month. However, this estimate is only for transferred data. When you create a Stretch Database server, you are charged for that server as well, and contrary to this estimate, it is not cheap at all. I realized this when I received an email, 4 days after my Stretch Database tests, saying that I had already consumed my 1,000 reais of credit in Azure (although I hadn't used anything yet).

After this scare (lol) I ended up researching more price of this resource, which is below so that you are aware of the cost of this service:

References
https://docs.microsoft.com/en-us/sql/sql-server/stretch-database/get-started-by-running-the-enable-database-for-stretch-wizard?view=sql-server-2017
https://docs.microsoft.com/en-us/sql/sql-server/stretch-database/limitations-for-stretch-database?view=sql-server-2017
https://docs.microsoft.com/en-us/sql/sql-server/stretch-database/pause-and-resume-data-migration-stretch-database?view=sql-server-2017
https://docs.microsoft.com/en-us/sql/sql-server/stretch-database/monitor-and-troubleshoot-data-migration-stretch-database?view=sql-server-2017
https://docs.microsoft.com/en-us/sql/sql-server/stretch-database/backup-stretch-enabled-databases-stretch-database?view=sql-server-2017
https://docs.microsoft.com/en-us/sql/sql-server/stretch-database/restore-stretch-enabled-databases-stretch-database?view=sql-server-2017
https://docs.microsoft.com/pt-br/sql/sql-server/stretch-database/enable-stretch-database-for-a-database?view=sql-server-2017
https://www.mssqltips.com/sqlservertip/5526/how-to-setup-and-use-a-sql-server-stretch-database/
That's it, folks!
I hope you enjoyed this article and see you next time!

Comments (0)
Loading comments...