Hey guys,
Good morning.
In this post, I will demonstrate how to configure Microsoft SQL Server Reporting Services (SSRS) 2016 on Windows Server 2016. As you know, Reporting Services is installed together with SQL Server, and when installing SQL Server, if you install Reporting Services as well, you can define whether you will configure it now or you will configure it in the future.
If you don't know how to install SQL Server 2016 on Windows Server 2016, see my post first How to install and configure Microsoft SQL Server 2016 on Windows Server 2016.
If you have chosen to configure SSRS in the future, you must open the “Reporting Services Configuration Manager” (Usually located in “C:\Program Files (x86)\Microsoft SQL Server\130\Tools\Binn\RSConfigTool.exe”).
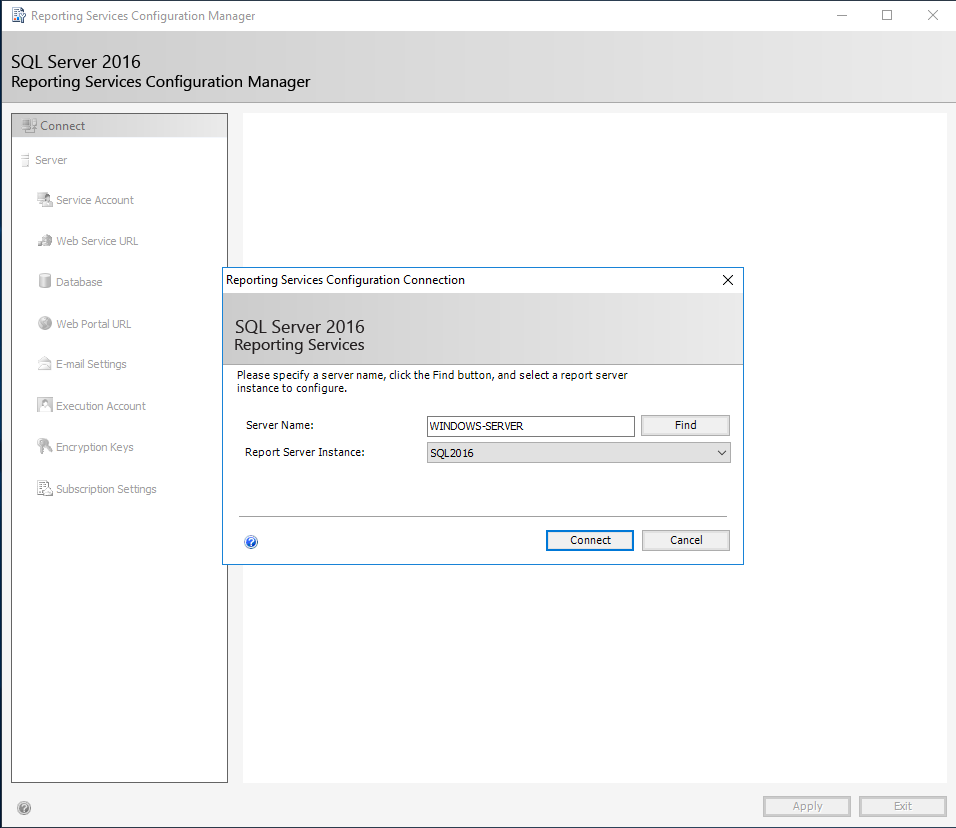
Defining the installation that will be configured
In this step, you must enter the name of the server where SSRS is installed and the name of the instance where the tool database (ReportServer) that will be configured was created.
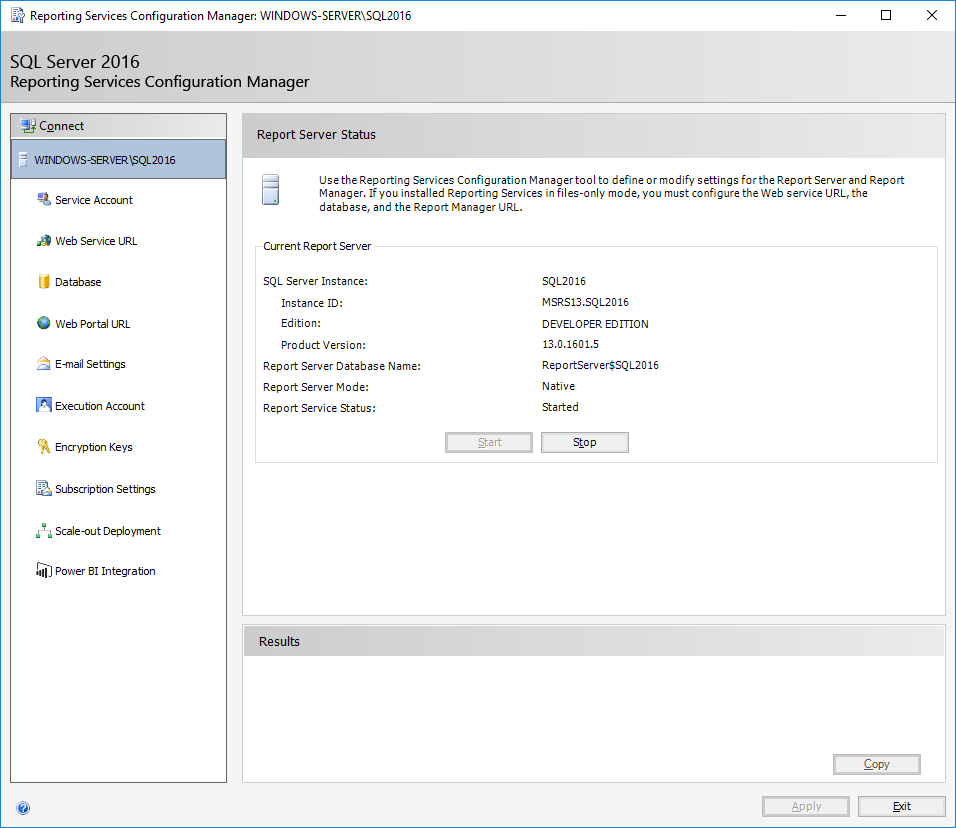
Service management and installation information
On this screen you can view some information about the SSRS installation, such as the instance name, version, edition, check whether the service is running and also control the status of the service, being able to start or stop it.
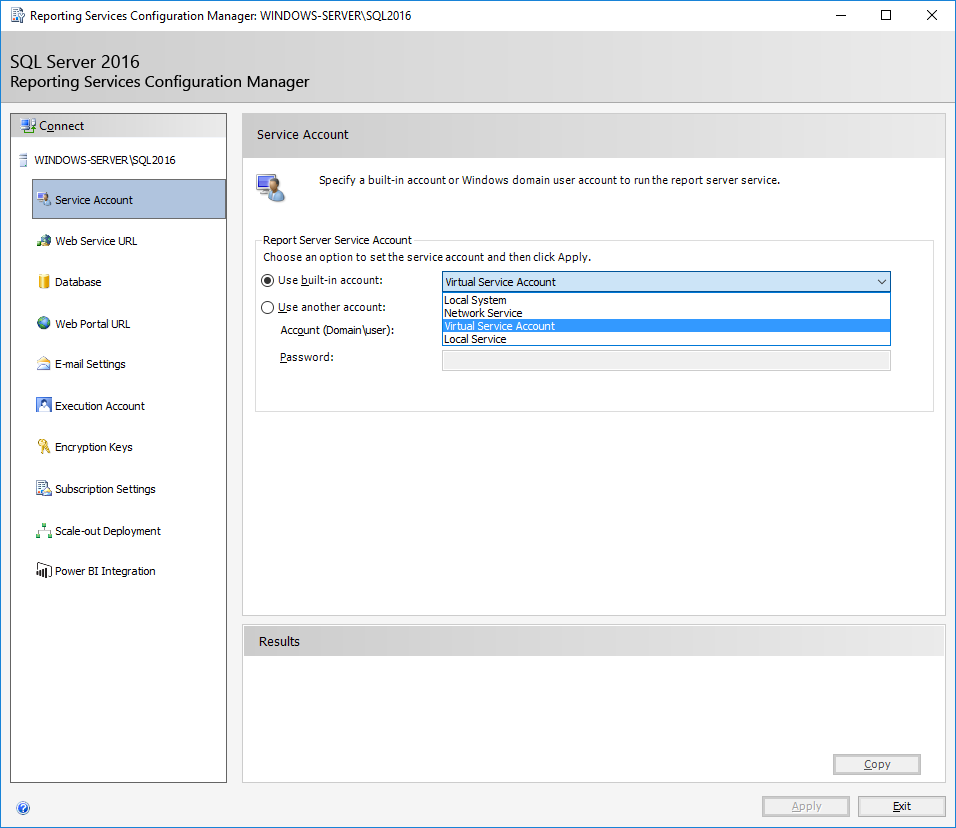
Operating system account (Service Account)
Here you can configure which operating system account Reporting Services will use to run. You can use one of the standard system accounts that the tool provides, or use a user from your AD (Active Directory).
On the configuration screens, you must click the “Apply” button on each screen where you changed a configuration before clicking on the configuration page.
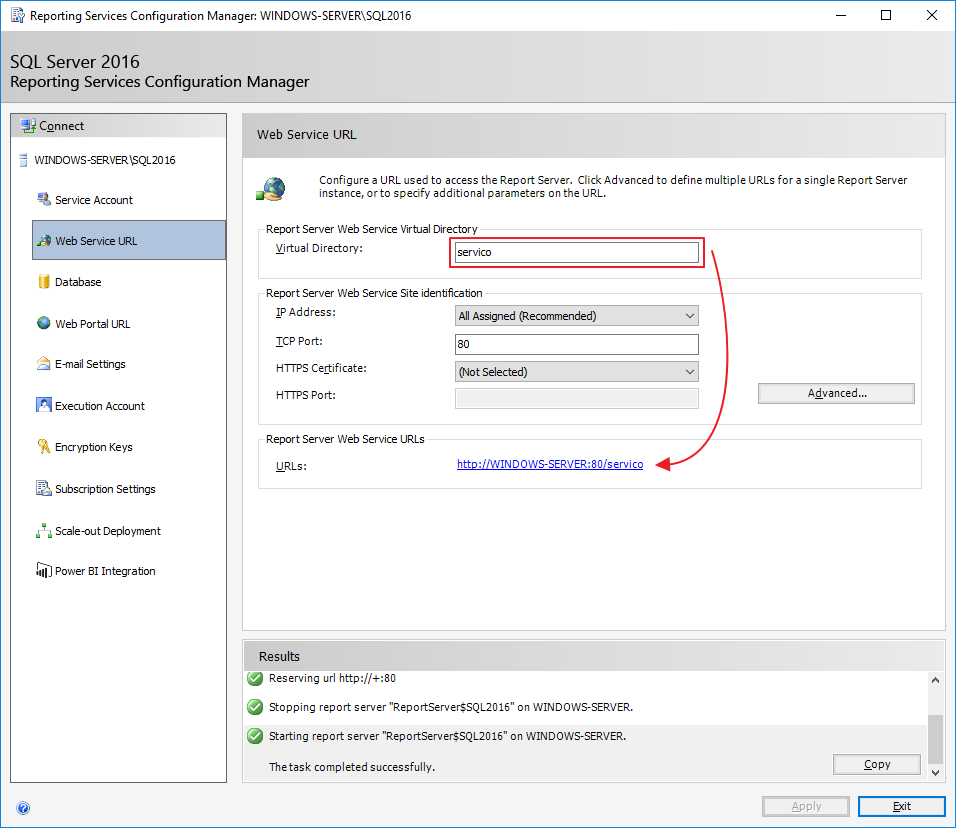
Configuring the Service URL (Web Service URL)
On this screen, it is possible to define the Reporting Services Webservice access URL, which developers can use to create integrations and applications that will integrate with the tool or to be used in tools such as SSRS Report Builder or Mobile Report Publisher.
As I changed the default URL name, I clicked the “Apply” button.
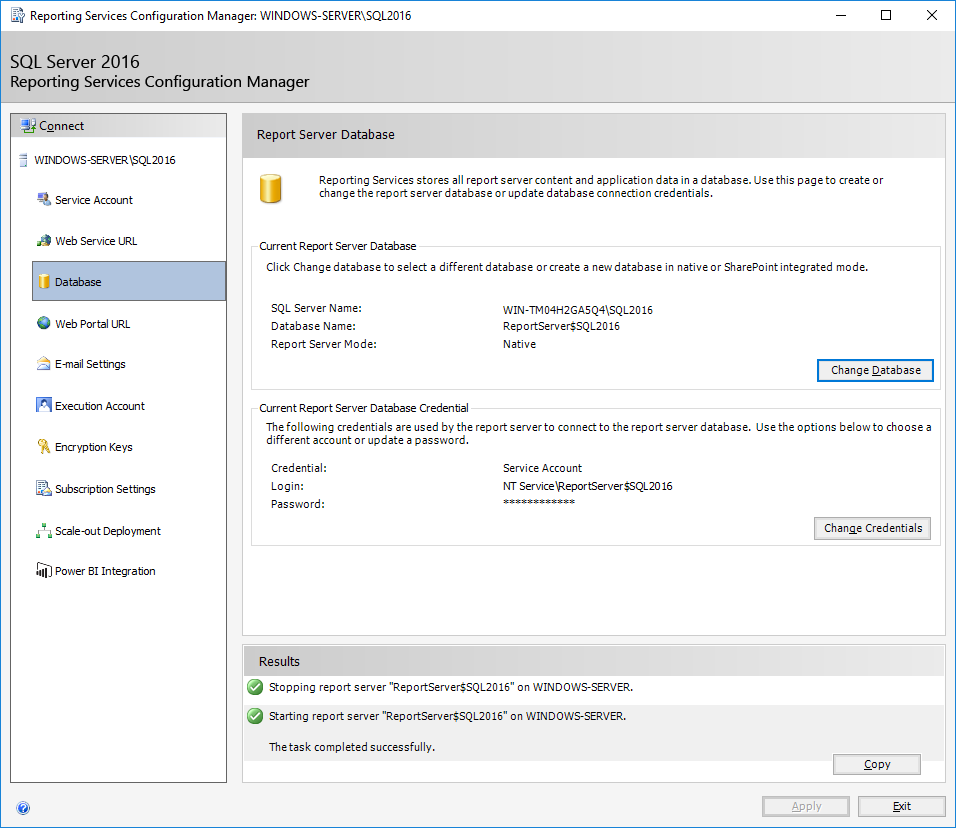
Configuring the database (Database)
In this session, you can define the database that will be used by Reporting Services to store objects, users and permissions (everything is saved in the database). You can use the default database or define a new name for the database.
It is also possible to define how the connection to the database will be made using the tool. The default configuration is to use a service account, whose access has already been previously granted by installing SQL Server on this database, but you can use an AD user or a SQL Server user of your choice.
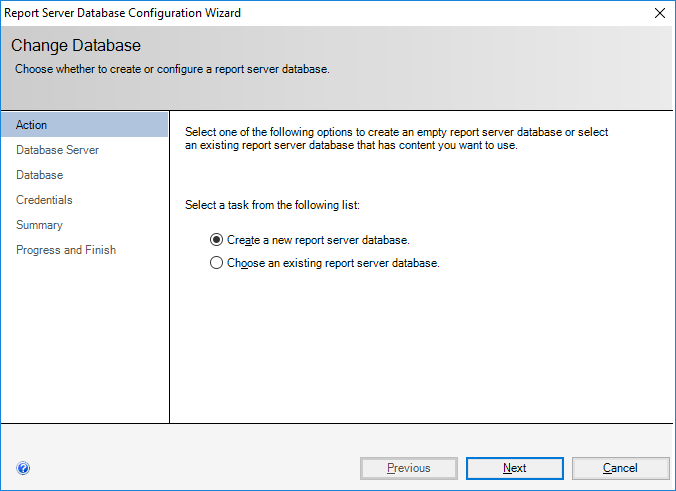
In this installation, I will change the Reporting Services database and create a new database to demonstrate how to do this. If you want to use the SSRS default database, you don't need to follow the steps below and you can skip to the next topic.
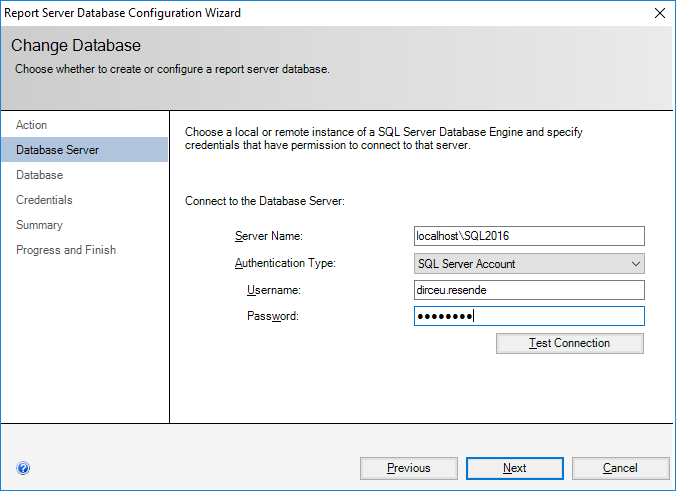
On this screen, you must configure a user with CREATE DATABASE privileges on the instance where you will create the new database.
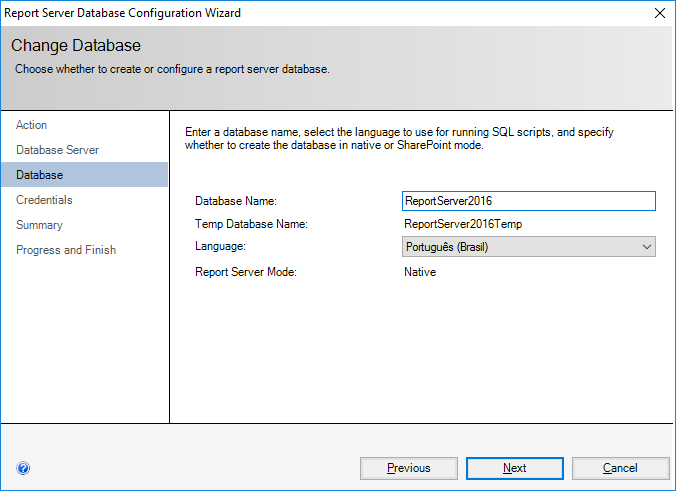
Here you will define the name of the new database that will be created.
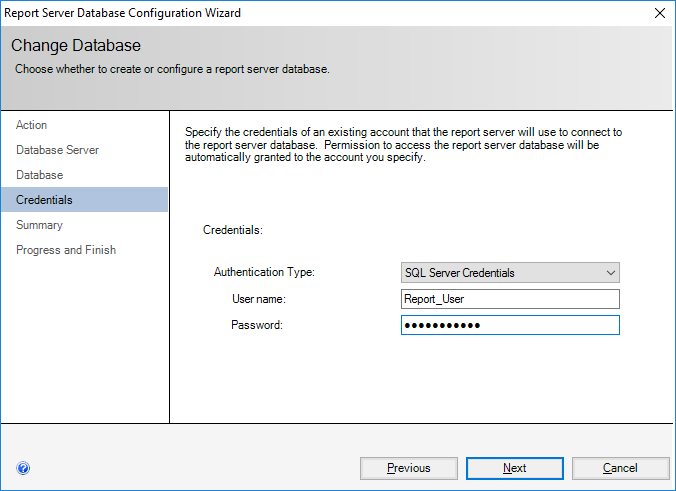
It is on this screen that you can choose which user will connect to the bank to carry out Reporting Services queries while using the tool.
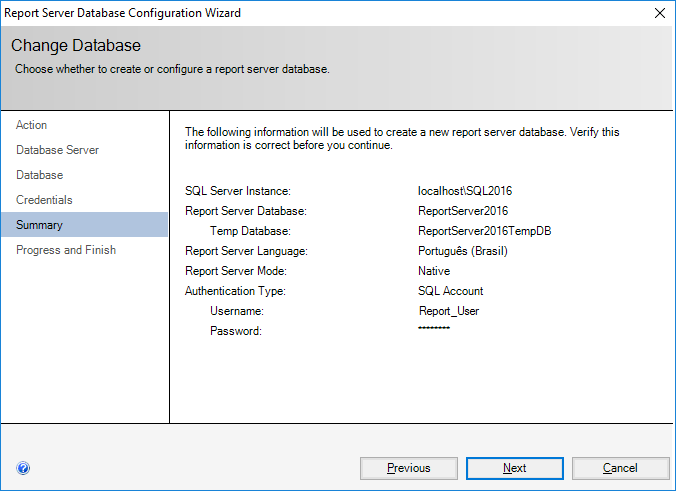
It's time to review your chosen settings.
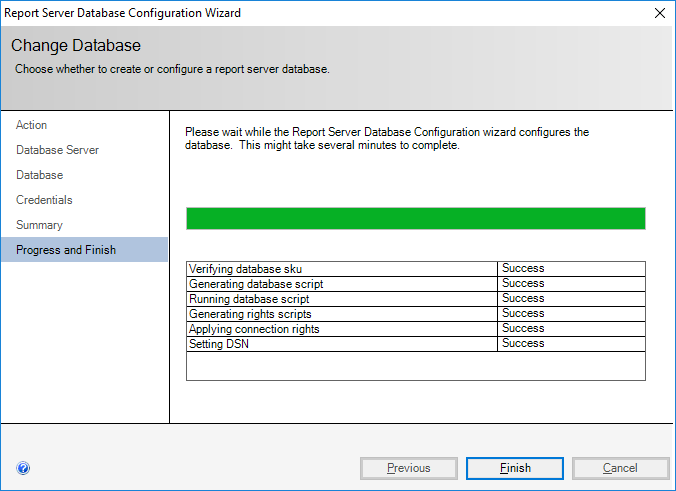
Database created successfully.
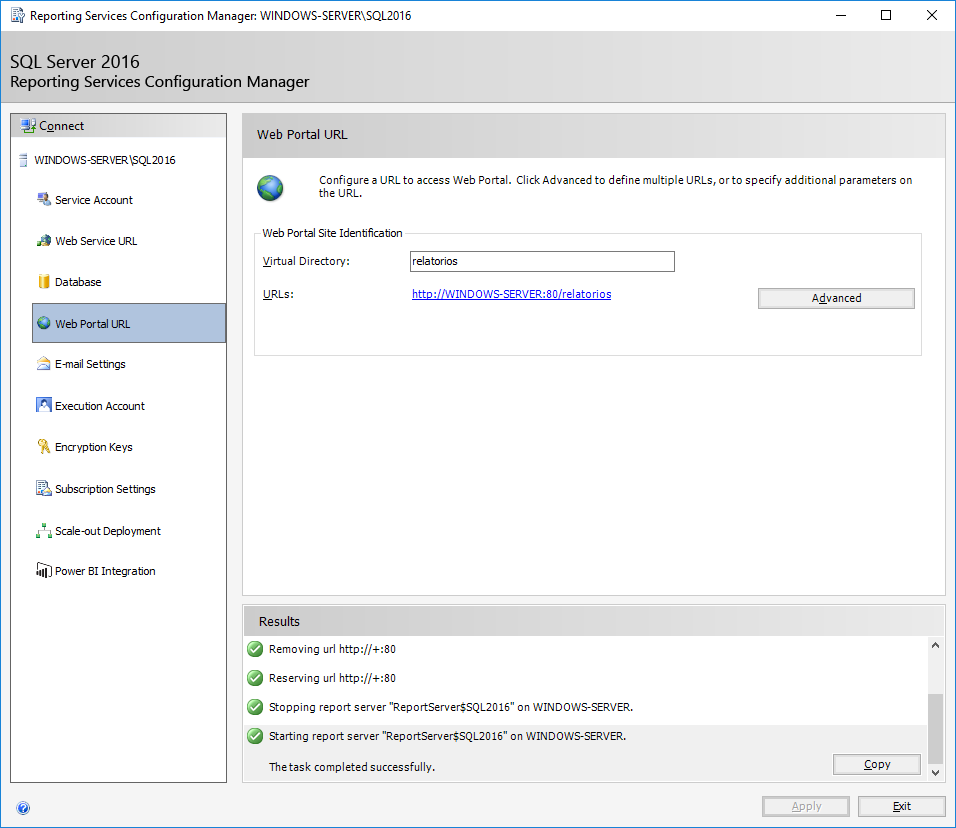
Configuring the access URL (Web Portal URL)
On this screen, it is possible to define the Reporting Services Webservice access URL, where users will type the address in the browser to view the reports.
Here, I will change the default URL name to “reports” and click the “Apply” button.
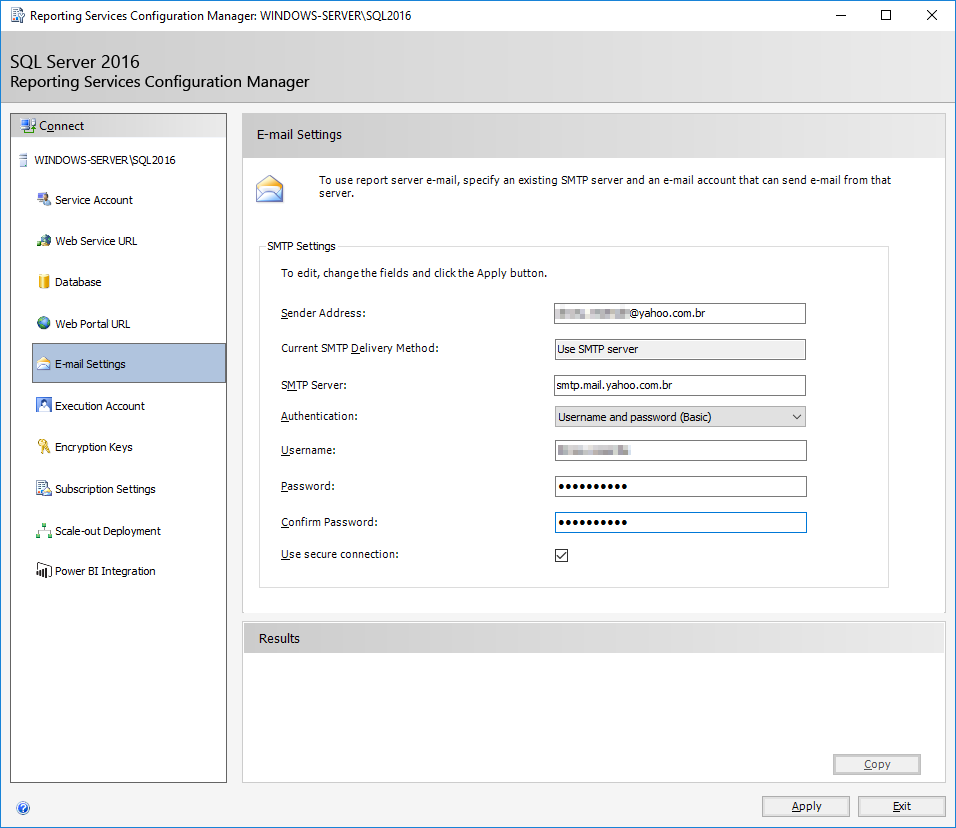
Configuring the E-mail account (E-mail Settings)
In this session, we can define which SMTP account the tool will use to send emails. As I'm on my test VM, I didn't configure an SMTP server (and that's not the intention of this post), but you can use an SMTP address from a public email server (Gmail, Yahoo, etc.) or your company's SMTP server.
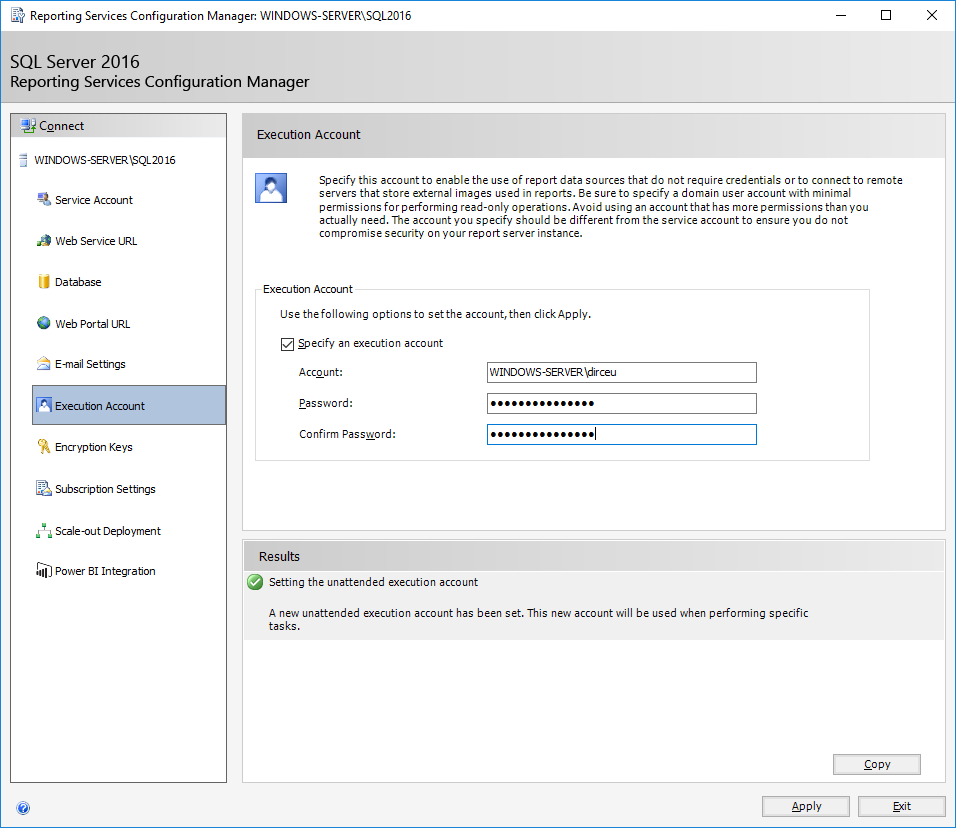
Configuring account for external access (Execution Account)
This account should be used in cases where you have reports that do not use authentication to connect to the database. In this case, the connection is made using the credentials configured on this screen or to access external data over the network.
This user must have read permissions but nothing more and must be an AD user.
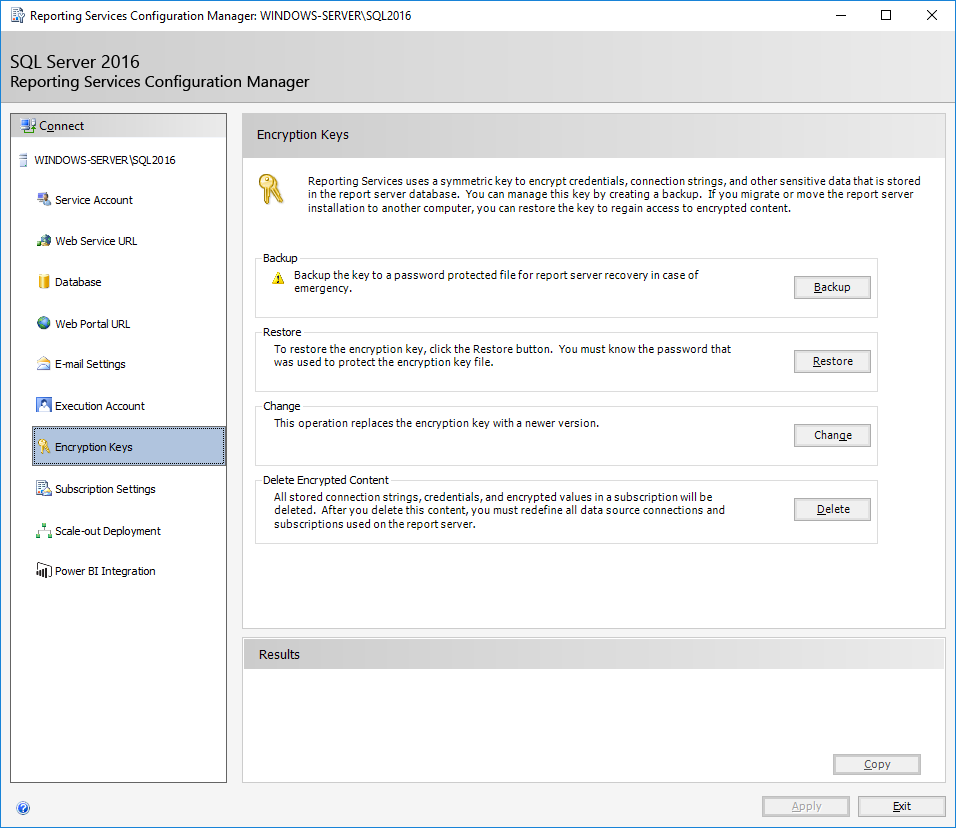
Configuring encryption (Encryption Keys)
On this screen you can backup encryption keys, restore, change and delete encrypted data. The first thing to do is make a backup of the encryption keys, so that it can be restored in case of problems or in case of server migration.
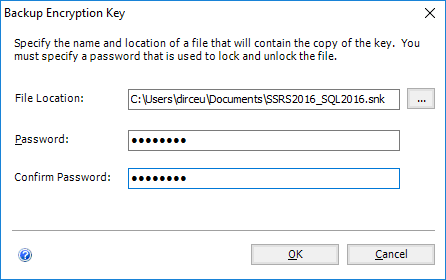
On the backup screen, simply define where the key will be saved and the password, which will be used as a salt.
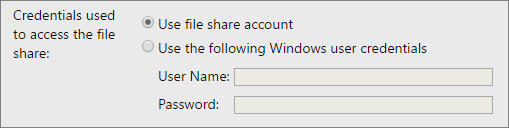
Configuring file sharing (Subscriptions Settings)
On this screen, we can specify an account to access file shares. The file share account allows you to use a single set of credentials across multiple subscriptions that send reports to a file share. When it's time to change credentials, you configure the file sharing account change and don't need to update each individual subscription.

If this option is checked, you can provide an account to use to access file shares through the report server. If you configure the file share account, all users can select the account for any subscription configured to send reports to a file share. If this option is not selected, the file sharing account will not be available in subscriptions.
Note that you need to verify that the account configured as the file share account has read and write permissions for file share users to use for file share uploading.
Configuring server scaling (Scale-out Deployment)
Scale-out settings are used to increase the scalability of report servers to handle more concurrent users and greater report execution loads. They can also be used to dedicate specific servers to process interactive or scheduled reports. Expanding deployments consist of:
– Two or more report server instances that share a single report server database.
– Optionally, a network load balancing (NLB) cluster to spread interactive user load across report server instances.
Basically, this configuration allows you to create clusters of Reporting Services servers accessing a single database, so that the information is shared between the servers, but each server processes the information in parallel, increasing the availability of the service and ensuring that they have more memory, CPU and disk resources to carry out this processing, since they are independent servers.

When deploying Reporting Services to an NLB cluster, you need to ensure that the NLB virtual server name is used in configuring the report server URLs and that the servers are configured to share the same view state.
Reporting Services does not participate in Microsoft Cluster Services clusters. However, you can create a report server database on a Database Engine instance that is part of a failover cluster.
Configuring integration with Power BI (Power BI Integration)
In this last session of the installation, you can configure the integration between Reporting Services 2016 and PowerBI, so that you can show the reports available in your PowerBI account within Reporting Services, in a single view and centralizing the reports.
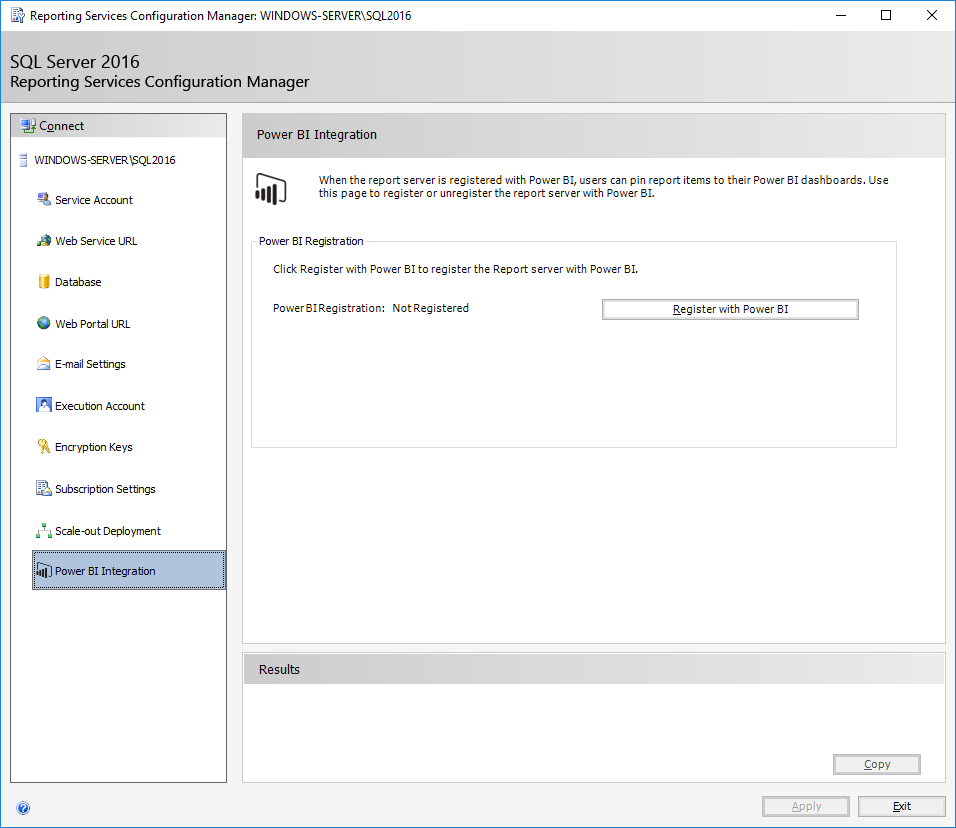
That's already a big step forward, but Microsoft innovated even more. During a October Technical Preview made available by Microsoft, we can see that in the next versions of PowerBI, there will be native support for exporting reports directly to Reporting Services, further increasing the integration between these two tools.
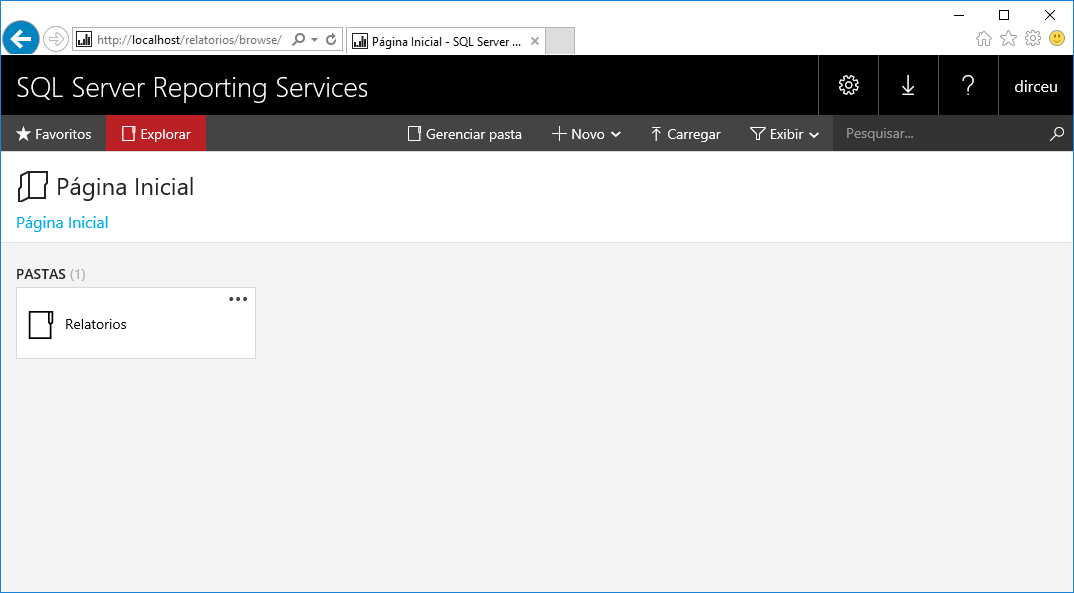
Accessing Reporting Services
Now that we've completed the installation, it's time to see if everything is working normally:
Access to the web portal (where reports are published)
Access to the Webservice (To create integrations)
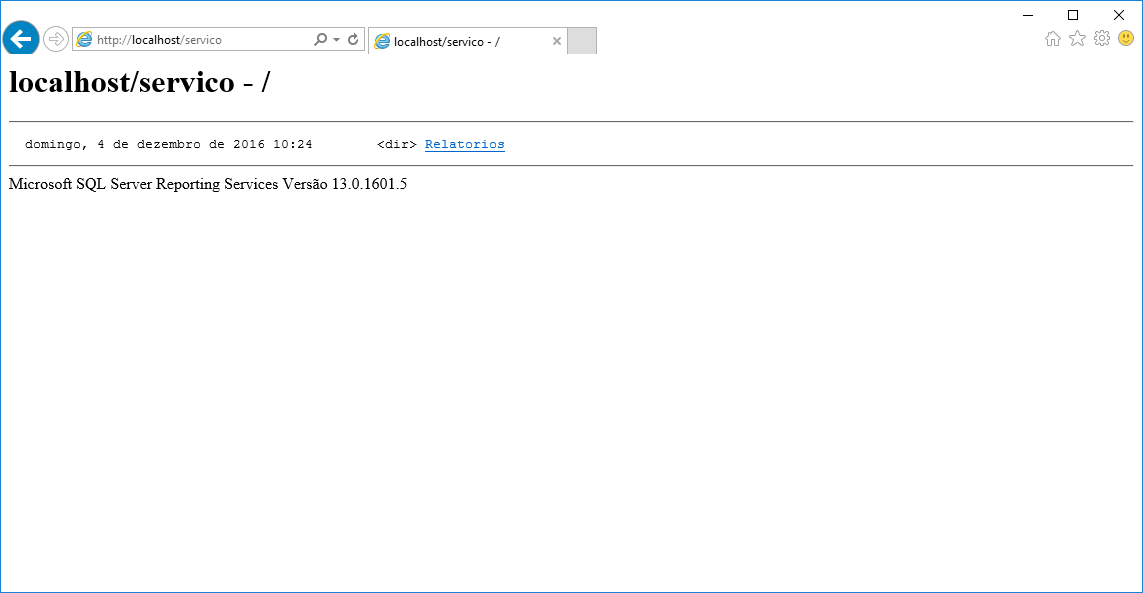
As we can see, the installation was completed successfully.
I hope you liked this post and see you soon.

Comentários (0)
Carregando comentários…